Thursday, June 21, 2018

Value of a Digit Sets 5.1-5.3 {Math Ladders BUNDLE}


BUNDLE: Value of a Digit -  Sets 5.1-5.3 {Math Ladders}
With the addition of Decimals, I've finally finished my Value of a Digit series. Set 5.1 (Value of a Digit Through the Thousands Period) is one that I use to introduce Math Ladders in my classroom within those first few weeks of school. It's a skill that most 4th graders should have mastered, so it's not too difficult. Yet, they also still need some practice.

Set 5.2 (Value of a Digit Through the Millions Period) is quickly added and then reviewed throughout the year. This skill is one my students seem to catch on to relatively easily, but then forget soon after. By  having this set pop up in their centers rotation I am able to ensure that they are constantly going back to review it.

Set 5.3 is one that I use after I introduce decimals and then keep adding into the rotation - for the same reason as Set 5.2!

Value of a Digit through Thousands Period -  Set 5.1 {Math Ladders}    Value of a Digit through Millions Period -  Set 5.2 {Math Ladders}     Value of a Digit - Decimals -  Set 5.3 {Math Ladders}

Or get them all for a discount...

BUNDLE: Value of a Digit -  Sets 5.1-5.3 {Math Ladders}

Friday, June 15, 2018

Math Centers/Small Group: Ordering Numbers {Math Ladders}

At the beginning of the year, as I'm introducing centers, I find myself needing something to fall back on that most of my students should be able to do with little support from me. Throughout the year, I also feel like they need to revisit place value just to keep it fresh in their minds and most of them also need to extend that learning.

This Math Ladder series was created to be used throughout the year in a 4th/5th grade classroom. I teach 4th and use the lower sets (2-digit numbers) to reteach comparing numbers to my level 1 students in small group and then move them on to independent practice during their independent center time.

The level 4 & 5 students start the year with a quick small group review of the Thousands Period set with me and then gradually move to the Millions Period set over the next few weeks/months during independent time.

Once I've introduced decimals, I move the whole class to the Decimals set, but only those that show proficiency move to the later Decimal ladders.

One thing I also use during small group instruction - and keep on hand in my classroom - is grid paper. There are so many uses for it, but I find that this really helps students when working on comparing numbers.

FREE!!!


Wednesday, June 13, 2018

Free Videos to Teach Science

My science block, on paper, is 45 minutes long. That includes changing classes, settling in, and cleaning up. With a bunch of 4th graders, you can imagine that we lose a bunch of time with transitions and lab clean up. 

One thing that I have found helps get them settled is to play a quick video clip at the beginning of class to introduce the topic I'm covering that day or review what we've already learned. I usually get everyone in the classroom, converse quickly with a teammate in the hallway about whatever is going on with the kids coming in or leaving my room (behavior issues, health issues, home life issues) and then make my way to the front of the room to the computer that has the video clip queued. At that point, most of my class is ready or close to being ready.

Sometimes I'll give them a quick introduction to what the video is about, but more often than not, I cover one benchmark over several days. In those cases, I use the video to review what we did yesterday and then deepen our understanding with labs/hand-on activities, notebooks, etc.

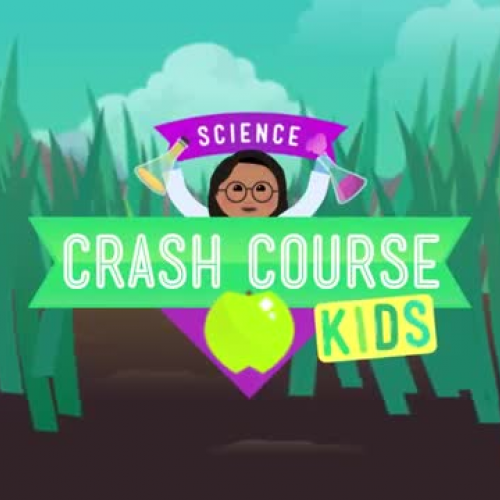
Scholastic Study Jams & Crash Course for Kids are two FREE websites with loads of science videos. (Study Jams also has math videos). And, of course, I have to mention Brain Pop. If you can get your school to pay for it - it's expensive- Brain Pop has videos covering nearly every topic in every subject. And, they have Brain Pop in Spanish & French - which was a life saver when I got a new student that didn't speak any English.

So, get your planner ready and start exploring. I personally like to get a list of my benchmarks out and then start penciling in video clips that go with each benchmark. If I have an extra 5 minutes at the end of class, I pull that list out and grab one of the clips that I wasn't planning on showing, but still goes with the curriculum.

That list is also a nice place to make a note of things you do NOT want to show in your classroom - certain topics like sexual reproduction in flowers (a FL benchmark) talking about sperm makes my boys giggle uncontrollably and is something I prefer to avoid, if possible. Though these are kid-friendly, I would highly suggest that you preview anything you bring into your classroom.


Brain Pop: If you are lucky enough to have a Brain Pop account, check out their Educator's Page. Did you know that you can pull up a list of your state's standards for any subject and they'll list all of the videos that go with each standard? The work is (mostly) done for you. Just print and start making your own notes.


Sunday, June 10, 2018

Animal Adaptations: Physical & Behavioral

Over the years as I've taught FL's SC.4.L.16.2 and SC.4.L.16.3 I've discovered that a chart really helps to sort everything out for my students. Below are two charts I've used (two different years) in the hopes of helping to organize my students' thinking. Some examples are driven by my students, but some things keep popping up on example tests, so migration, hibernation, and sea turtles are on both charts.


Saturday, June 2, 2018

CPALMS: Flower Dissection

In order to teach the benchmark related to sexual reproduction in flowers (oh yes, it's great fun to teach a bunch of 10 year olds about SC.4.L.16.1...) we dissect flowers in my classroom. I can't take credit for the entire lesson - that belongs to CPALM: Dissect It! This lesson is a really great one, but I've modified it to meet my own needs - as teachers do.

The first thing I do is start out with an introduction using the PowerPoint from the CPALMS website. Then, we dig into a flower - literally. I buy flowers from Publix and we cut them into shreds (we hate wasting the flowers, but hey...the classroom smells great by the end of the day!).

In previous years, I've explained everything to the students and then given them a variety of flowers depending on what was available from Publix at the time. What ensued was sometimes confusing...some flower parts are very obvious when being dissected, but for students that have never seen a stamen or pistil, things get confusing.

However, this year I managed to find several bouquets of Alstroemeria - which are very easy and predictable to dissect (with a little bit of research by the teacher). I especially liked that there were actual numbers the students could look for - 3 petals with stripes; 3 sepals (same color as the petals, but no stripes); and 6 stamen. Some of my kids found a "seventh" stamen, but then realized they were holding the pistil.

After finding and sorting out all the pieces, students wrote labels in their notebooks and then taped everything down. I encouraged them to go to town with the tape and really seal everything in. (Buy rolls of tape & dispensers at Dollar Tree for your groups...it's actually pretty decent stuff!)


The pictures below are of the same notebook page...

The day I did the science lab. Two months later...dried out & faded....and pollen grains have turned to powder on the stamen, but they're still sealed up.