Saturday, May 26, 2018

Chemical Changes with Glo Sticks


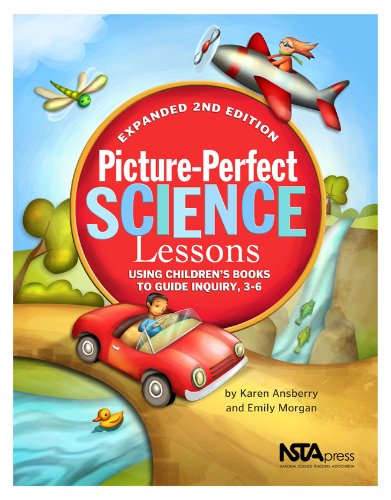
Image result for picture perfect science
This is one of the easiest, yet best, wow-moments for my class. When we're studying chemical changes, we talk about how to identify whether a chemical change has taken place. And, while I love using the Pancakes lab from Picture-Perfect Science, this little demonstration is great for introducing the topic (especially after they've read the text in this book that discuss light emission as being one way to identify a chemical change).


Grab yourself a package of glo-sticks from Dollar Tree (I tossed a couple of packages in there to last a few years) and pick your favorite color. The science behind the glo-sticks is very simple: you have a glass tube inside of a plastic tube. The glass tube holds a colored chemical and the plastic tube holds another chemical. When you bend the glo-stick, the snap you hear is the glass breaking. The two chemicals mix and - viola! - light is produced.

So, get your materials ready: your glo-stick, foil (it enhances the light!); scissors; and a paper towel.


Safety Note: I don't recommend getting the chemicals on your hands. But, honestly, I have. Nothing happened. I was, however, quick to make sure I washed my hands. I do this lab as a demonstration in my class just in case a student were to have a reaction to the chemicals. Read up on Steve Spangler's discussion on glow-sticks. He also includes the exact chemicals that are contained in most glow-sticks. He cautions against opening them up to get at the chemicals...hence why I do this as a demonstration in my class. That, and you're breaking glass... having students do that would just be plain irresponsible.

Make sure you zoom your document camera in so the kids can see the small, transparent/translucent puddles clearly.

Being careful to not cut the glass tube, snip the ends off the plastic tube and let the clear liquid drain onto the foil into a puddle.

Let the glass tube slide out and dry it on the paper towel. Then, break it in half. The liquid tends to remain in the tube until you break the ends off. Let the colored liquid in both of those drain out into one puddle. (Blue is usually clear instead of colored.)

Turn off the lights.

Using the left over tubes or a clean toothpick, start pushing the liquids towards each other. Just when they meet, they'll glow. You can then push the puddles together and play with it.


Okay, I enjoy this part more than the kids. After all, they're not getting to touch this lab!! Have fun!!!


Sunday, May 20, 2018

Ecosystem Murals


At the end of the year, as my students are going a little stir-crazy after weeks and weeks of writing essays (pretty much the whole year, to be honest), I look forward to addressing benchmarks that aren't on our state test - and there are a good number of them! So, we wrap up the year with a narrative essay project, some cursive writing, and then tackle the technology benchmark combined with the speech/presentation benchmark. I teach both Language Arts & Science - and since our Life Science unit is during the spring - I combine the two subjects and have the students research animals, create & present Power Points, and then we finish the unit by creating a mural of an ecosystem. If you're lucky enough to have AIMS Exploring Environments, then this project is easy to do.

Step One: Decide which environment you want to focus on. If you're doing the mural at the end, all students need to do the same environment. We live in FL and are supposed to be studying local ecosystems, so I chose the beach again this year. (I really love doing the Polar regions, but they aren't as easy to tie into my own curriculum.)

Step Two: Have the students choose animals. I highly recommend getting the AIMS book (I saw it for under $10 on Amazon.) and having students choose animals from there. It will make your life so much easier. Also, I let my students choose whether they wanted to work in pairs or on their own.

Step Three: Decide on what you want to have students put in their Power Points. I based ours on what was in the AIMS book already and required 3 facts for each content slide.

  • Slide 1: Title Slide
  • Slide 2: Habitat
  • Slide 3: Diet
  • Slide 4: Predators
  • Slide 5: Characteristics
For the presentation, I also required certain digital elements (a change to the theme, animation/slide transitions, sound, and a picture).

Step 4: The AIMS book has a chart for each ecosystem with the above information. I wasn't using this as a research project (due to time), so I cut out each row of the chart and gave them to each group as a base for their Power Points. There's a second chart in the AIMS book with a picture of the animal and a paragraph with much of the same information, but sometimes there's new facts too. I also cut those out for each group. Then, I modeled how to put together a presentation from start to finish. This is a great time for you to pick an animal from another ecosystem and use the same charts to show students that it doesn't need to be that complicated. Finally, turn them loose and let them design their presentations. I'm always amazed at how well they do on their own!

Step 5: Present & get those grades. I required 3 grades for this project.
  • Story Board: I had students create a minimum of 5 index cards to match what their slides would show. They had to have their 3 facts per slide before I would allow them to move onto the computers.
  • Power Point: I graded each slide for content and then the overall presentation for digital elements. I also deducted points for spelling if there were errors.
  • Presentation: This is the scariest part of the grade for the kids, but I made it as non-threatening as possible. Everyone started with a base of 60 points for getting up in front of the class and earned points for the following:
    • +10 Points for speaking
    • +10 Points for speaking at a volume that could be heard
    • +10 Points for looking at the audience
    • +10 Points for adding extra comments (not just reading the slides)
Step 6: Moving on to the fun stuff! Each group used the doc cam to trace their animal onto white butcher paper. We did this over several days. When not tracing, students used that time to do some extra grammar & cursive grades for me or catch up on their reading for their reading teacher. I also had them create a 4x6 index card with all of their Power Point information on it to display near their animal on the final mural.

Step 7: Painting Day - For just one day, we broke out all the paints and let the kids go to town. Since I teach multiple classes, I had to devise a method of storing 50+ large half-wet masterpieces. I had the kids lay them out on the floor and turned a fan on them on high. They dried quickly and most were able to be stacked by the time the next class needed that space.

Step 8: Painting Day 2 - For this day we only brought out the black paint so the kids could outline their animals to make them POP out on the mural. Now the kids are starting to see them come together!

Step 9: Put it all together. On this day, we cut out the animals, put a bunch of wet glue on them, and stuck them to the butcher paper background I had already created in the hallway outside my room. After several years of doing this, I've learned that the larger animals need to go up first (or at least make a plan for them). Since some of my dolphins & hammer head sharks were in my last class, I made sure I directed students to keep their animals - especially the smaller ones - closer to each other.


Tuesday, May 15, 2018

Test Prep Game Centers - Mostly Free


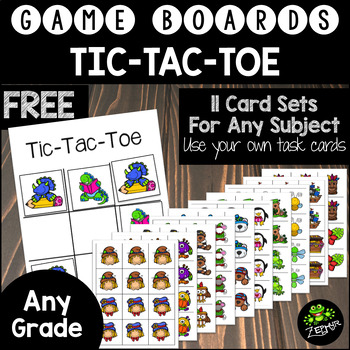
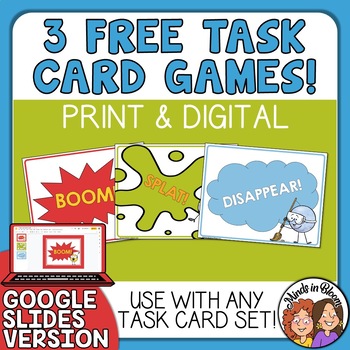
Tic-Tac-Toe {FREEBIE}     BOOM! A Game to Play with Task Cards: FREE!   
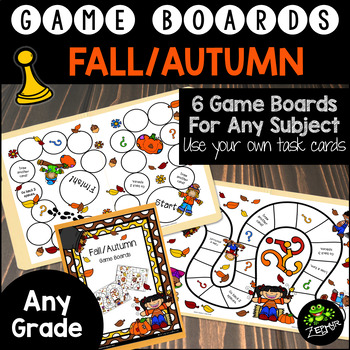
Fall/Autumn {Game Boards}        Jenga Game, Board Games


I love using centers in my math class. It gives me time to meet with a small group of students to focus on what they need at their level. The rest of the class can use that time to practice skills they need to work on. After teaching math for several years - and getting a handle on what the kids REALLY need to practice vs what they pick up rather quickly - I started creating task cards by the boatload. Many teachers use my task cards to play Scoot, but a whole-class activity doesn't work for small group time.

Enter Game Time. What's really nice about the games above is that once the kids learn the games, you can switch out task cards and change up the skill they're practicing - without having to reteach the game. Plus, it makes the kids feel like they're doing something different each center rotation - when in actuality, they're just doing task cards. And set up...don't even get me started about how EASY it is to set up for these games! I keep a 6x9 manilla envelope labeled with each game, rules on the back for reference, and drop a new set of task cards in each week. Or, rotate the sets to a new game for more practice on that skill.

A few things...

Tic-Tac-Toe (FREE): Print out a couple of boards for partners to use and then leave them in the center. Change out the tokens every month to go with the season.

Boom (FREE): Not mine, but a favorite of my students. You'll need an oatmeal container (large, cylinder kind) and then you're good to go. My kids love this game.

Jenga (FREE): You need a Jenga set you don't mind writing on - check Goodwill. Number each block. Play like regular Jenga, but in order to pull the block, kids have to answer the question on the corresponding task card.

Game Boards (Not Free): I have a bunch of game boards in my store that can be used throughout the year to go with the different seasons. Each set comes with 6 different board layouts so things can look a little different when students visit this center. But, with the rules being the same, kids won't be up at your desk asking questions about how to play.

Friday, April 27, 2018

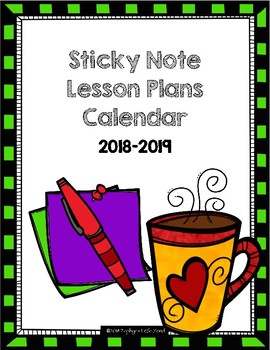
Planning Calendar 2018-2019 - Post-It Note Style!

I got a request for next year's Sticky Note Calendar and realized I needed that ready for myself, so it's posted and ready for you to download (for free!).

For those who have never seen my Sticky Note Calendar, I'm one of those people that actually plans out units well in advance (like a 9 weeks at a time, minimum). I use this calendar to make moving things around easy on myself - including moving things from one year to the next.

This year alone, I've dealt with losing 6 days for a gall bladder attack/surgery, losing another 8 days for hurricanes, and then losing 5 days when I needed to cover a co-worker's class due to an emergency right before the state test was slated to be given for his subject. It's my 13th year of teaching....seriously.

This calendar let me move things around when I needed to without me having to stress about keeping all of my essential questions, benchmarks, etc lined up nice and neat on my true lesson plans. I simply shifted things around, added sub lessons, tucked a lesson I couldn't get to this year in a corner to be saved for next year, and kept on going. When chaos settled down, I sat down and wrote up the real plans for my administrators. Since I had moved things around and added things as life was happening, I had an accurate picture of what we did those days.

Classroom Sticky Note Planning Calendar (2018-2019)


Saturday, April 14, 2018

Complete & Incomplete Metamorphosis in the Classroom

Spring is here! And with spring comes my life sciences chapters. One of my favorite things to do in my classroom is to set up my science center with tons of insects for the children to observe. And, they love it too!

In our curriculum, we have to teach both complete & incomplete metamorphosis. For most, complete metamorphosis is very familiar: egg, larva, pupa, & adult. Many, however, have never heard of incomplete metamorphosis: egg, nymph, & adult. To help my students grasp this concept, I prefer to bring in animals they can observe. If your school will let you, it's what I've found to be the BEST way to teach these concepts. Below are some examples of animals you can hopefully find in your own yard (or the kids' yards) to start your own science center along with little tidbits of information I've learned along the way.

One of our science centers...
From Left to Right: Tadpole Aqaruium (10 gal), Butterfly Habitat (Exo Terra Small), Grasshopper Habitat (10 gal), Lady Bug Habitat (Exo Terra Nano), and the tiny red one is our Meal Worm Habitat


Complete Metamorphosis


Monarch Butterflies - probably the most common example of a butterfly, so posters are easy to find. I have seen the butterfly net-contraptions that are frequently sold and have been disgusted with them....exactly where does the poop go??? Yeah. Gross. So, I came up with the idea of using an aquarium with about an inch of fresh dirt straight from our backyard playground on the bottom. That dirt contains all the bacteria you need to break down the larva's waste so your habitat isn't a horrendous mess. In fact, I put soil in all my habitats for that reason. Now, once you're completely sold on having butterflies in your classroom, it's time to order a real terrarium for them! :) I recommend writing a Donors Choose project for a real terrarium. I personally prefer the Exo Terra line, but any will do.
-Exo Terra Small - for a decent sized habitat
-Exo Terra Nano - for a smaller habitat that is still great for insects

Frogs & Tadpoles - Tadpoles are easy to care for in a standard aquarium. Fill the bottom with 1.5-2 inches of aquarium gravel, add 3-4 inches of water, and then add some rocks that stick out above the water. Remember, as their lungs develop, you'll need a place for them to rest. You'll also need a way to circulate the water.

Small/Inexpensive Set Up: Get a submersible pump and arrange the rocks nicely around it to make a little fountain. Make sure there's a current of moving water in the tank.

A Bit Nicer: Get a Decorative Reptile Filter (basically, a pump inside of a nice rock waterfall that's designed to fit in the corner of your tank).

The cover of the aquarium needs to fit securely. My very first tadpole, Lucky, grew his legs and hung out on the side of the tank for a few days. One day we came in and Lucky was gone. :( We found him a few weeks later...poor Lucky wasn't so lucky. He was found, dried up and dead, on the other side of the classroom. Lesson learned. I've now got a screen lid from the pet store (cost me about $10). I can't find an example on Amazon, though. Check your local pet store.

Needed in My School....Maybe Yours...? - Mosquito Dunks - I get mosquitoes in my FL classroom and a frog tank with semi-moving water just draws them. Thankfully, if I use a part of one of these in the water (I drop it in the decorative filter so I don't have to look at it floating in the water) the mosquitoes don't survive and the tadpoles do great.

Oh! And you need to feed those tadpoles. :) Tadpole Food

Once you have frogs...release them or move them to a more water-based toad tank. Though, I've always just released them back to my own pond.

Toads - You'd think these would be just like the frogs, and they are if you're raising toad tadpoles. But, once you've got adults, they need dirt to dig around/hide in and not much else. I put a nice little stone "swimming hole" in there for them and some fresh branches/leaves for them to hide in. Then, just feed them crickets and you're good to go.

Image result for lady bug larva
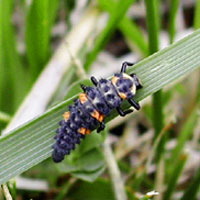
Lady Bugs - Most have never seen lady bug larva - and if you have, you may not have known what you were looking at! I call these my Carnivorous Beetles until one completes its life cycle and the kids realize what we have. Some are terrified of getting too close to the larva - carnivorous, yeah, I get it! They eat aphids (those yellow bugs on milkweed). And lady bugs are a type of beetle.

What you need....a container and a supply of aphids. If you have milkweed, you may already have those terrible, yellow bugs. I would snip off a branch full of yellow bugs first thing in the morning and put it in the lady bug tank. Halfway through the day, once the bugs have been cleaned off, move the branch to the butterfly tank and let them finish off the leaves. Win-win!

As far as the container goes, a large plastic jar (like a pretzel jar from Costco) can do the trick. I would cover it with a piece of tulle instead of the actual lid. Secure it with a rubber band. These things like to try to escape. When you're ready to upgrade, go with the Exo Terra Nano. I got this for my room this year and it looks awesome!
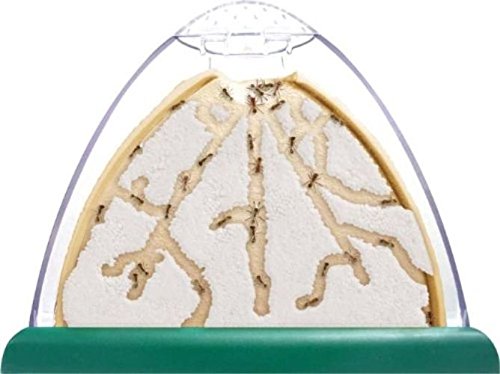

Ants - Buy an ant farm!  This year is the first year I've had one in my classroom and it's been a lot of fun. I got the ant farm off Amazon and the ants too. The ants on Amazon are larger than your average garden ant so they can't escape. (Really, don't even try to attempt to get your own ants. It's not worth the liability risk.)

Care: A couple drops of water and a piece of carrot every few days and you're all set. Though, I'd recommend that the teacher be in charge of feeding this critter...just in case! (In fact, in my class I duct-taped the lid shut -even though it snaps shut tight...and all but threatened my kids that if I saw anyone opening the top. So far, no one has dared touch the top, but they're all very excited to crowd around the table and watch them scurry about.)

Meal Worms - I'll be honest...this is a first year for meal worms. One of my students brought in 4 of the things and they're happily munching on the oatmeal I keep dropping into their habitat for them. We'll see what happens...

Incomplete Metamorphosis


Grasshoppers - Did you know that those black grasshoppers with red/orange/yellow stripes down their backs are actually the nymph version of the "beautiful" and colorful lubber grasshoppers?? I didn't until last year! We caught a bunch of the black ones (they'll eat anything...just pop them into a secure aquarium with an inch of soil on the bottom and a bunch of leaves on branches and they're happy) and watched them shed their skins. Heads up...some sheddings look like dead grasshoppers... We left these insects in the tank for the last two months of school and got to the point that one of them was starting to sprout little wings!

And, I know that a lot of people hate these things because they ruin plants. Just do your kids a favor and bring them into the classroom anyways. When it comes to incomplete metamorphosis, these are really easy to care for and readily available. Of course...if you don't like grasshoppers....you can always observe roaches...!!!!

Image result for lubber grasshopperImage result for lubber grasshopper


Crickets - Crickets are brought into my class for one main purpose....the toads. But, while they're there, we might as well observe them too. I put them in a small tank with an inch of soil on the bottom (in case they decide to lay eggs) and a place for their food/water. You've got two options for cricket food....the orange food/water combo or the food and water gels separate. I've used both and prefer the food and water separate. I can't seem to use it up in one year and the separate ones seem to last until the next year if stored properly.

Roaches - EWW!! This is where I draw the line. I will mention this in class, but I refuse to bring them into my room!

Extras...

Models: These can get pricey (they run about $10 each set), so I'd recommend writing these into a Donors Choose project or pick them up slowly over the years. But, they're great for kids that need to see all the stages at the same time. Just yesterday I was talking to my kids about complete & incomplete metamorphosis and asking about the ant. Someone said an ant went through incomplete metamorphosis and I heard another student very quickly interject and refer back to the models. YES! :)


Books: I feel like we should always have books tied into our curriculum available for the students, so I first check our own library to see what's available. This year, I also wrote a Donors Choose project for some National Geographic books about Ants, Butterflies, Frogs, and a variety of different animals we could use for our life science chapters. I really appreciate the National Geographics series because they are written on a variety of levels and some are even available in Spanish (a big help with my new students that speaks no English!).

FL Benchmark: SC.4.L.16.4

Monday, February 12, 2018

Valentine's Day Cards for Students

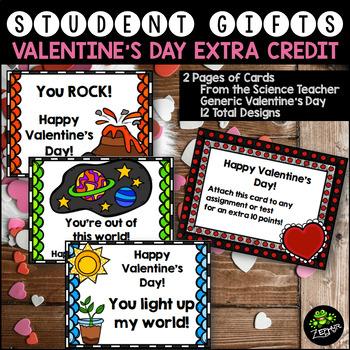
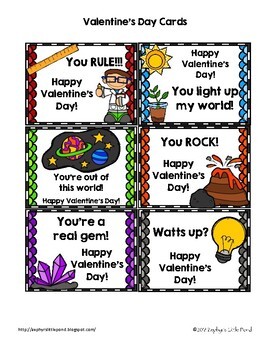
When it comes to Valentine's Day, I hesitate to give my students the boxed cards....you make my heart flutter? I only have eyes for you? Yeah, just not appropriate! But, I have yet to find a decent set of Valentine's Day cards on the internet with graphics that I just love to print out for my 4th graders. So many have chemistry puns that, while I find them quite amusing, will fly over my kids' heads. They're only in 4th grade!

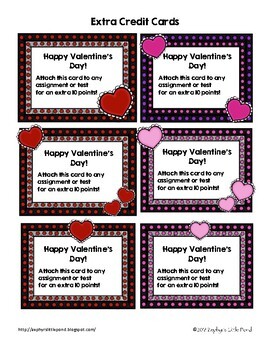
So, I created some cards for teachers to give their upper elementary students. The first set is science-related, but the kids will understand them. The second set contains coupons for extra credit! Who wouldn't love that?? (Both sets are in the same document on Teachers Pay Teachers.)

Valentine's Day Cards
Valentine's Day Cards Valentine's Day Cards