Monday, January 27, 2025

Exploring Mineral Properties: A Hands-On Activity for Color and Luster

Teaching students about mineral properties becomes exciting and interactive with this hands-on activity focusing on color and luster. Using the video clip in the file below as a discussion tool, students will observe, analyze, and record these properties for their mineral samples, gaining a deeper understanding of how scientists classify minerals. This activity is perfect for introducing key mineral concepts while emphasizing the importance of accurate scientific observation.

Color

Begin by exploring color, one of the most noticeable but least reliable mineral properties. Discuss how minerals like calcite and quartz can share the same color, or how a single mineral, like fluorite, can occur in a variety of hues—purple, green, white, yellow, and more. Have students carefully observe their classroom mineral samples, noting their colors on the Mineral Properties Recording Sheet. Afterward, watch the video clip included in the resource, which explains why color alone is not sufficient for identifying minerals. Use this as a springboard for classroom discussion about observation limitations and variability in nature.

Luster

Next, move on to the property of luster by watching the corresponding video clip, which introduces the categories of luster: metallic, glassy, waxy/semi-shiny, and earthy/dull. Using the Luster Sorting Mat, have students place all their mineral samples into a single pile. Work together to sort the samples into categories based on their luster. First, identify and group all metallic minerals. Then, move on to the glassy, waxy, and earthy samples, discussing the defining characteristics of each category as you go. Students should record their findings on the Mineral Properties Recording Sheet, building a comprehensive profile for each sample.

By combining video instruction with hands-on sorting and observation, this activity helps students develop critical thinking and classification skills. It also reinforces the importance of using multiple properties to identify minerals, laying a strong foundation for future scientific exploration.

Using Boom Cards for Review

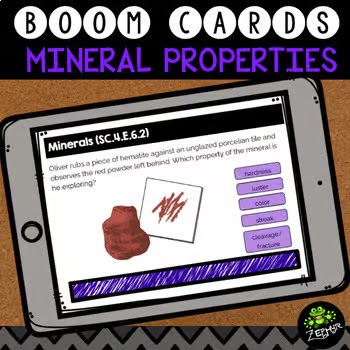
For an engaging way to reinforce the concepts, try using my Boom Cards to help students review the properties of minerals. These interactive, self-checking digital task cards are perfect for preteaching key content, helping absent students catch up, or giving extra practice to those who need it. Whether used in the classroom or at home, these cards make learning both fun and accessible for all students.

Wrapping Up

To enhance your lesson on mineral properties, I’ve created sorting mats designed to help students categorize and analyze mineral samples in greater detail. These mats are a valuable addition to any classroom and can be downloaded below. Through hands-on learning, students can bridge the gap between theory and practice, transforming the properties of minerals into an engaging and interactive experience. If you’re teaching this topic, I highly encourage you to try this activity—it’s educational, enjoyable, and sure to make a lasting impact on your students!


Monday, January 20, 2025

Exploring Mineral Properties: A Hands-On Activity for Breakage


Teaching the properties of minerals is one of my favorite science lessons! It’s exciting to see students engage with real-world examples, and I’m lucky that it aligns perfectly with Florida’s 4th grade science standards. Even better, my 5th grade colleagues have asked me to focus on this topic as part of the Florida Science FCAT review, so I get the chance to dive deep into this fascinating subject. This post is part of a new series on my blog where I explore hands-on activities for teaching the properties of minerals.

Hands-On Learning with Mineral Samples

To make this topic come alive, we dedicate an entire week to observing and testing mineral samples. The school provides a variety of samples, but I’ve added a few extras to ensure we have a diverse collection. Students get the opportunity to explore key properties like luster, hardness, streak, and more. However, one concept that consistently challenges them is studying the property of breakage, specifically how minerals break with either cleavage or fracture.

Cleavage vs. Fracture: A Memorable Lesson

To help clarify this tricky concept, I take the students outside for a special hands-on activity. Using 4oz hammers (use the Kids Workshop ones available from Lowes), they break apart pieces of calcite, which is readily available on Amazon and perfect for this lesson due to its predictable cleavage patterns. The excitement in the air is palpable as students take turns observing and participating in the process. Each student gets to keep a small piece of calcite, which makes the activity even more memorable.

During the activity, I emphasize safety, providing goggles to ensure everyone stays protected. As the students break apart the calcite, they see firsthand how it splits cleanly along flat planes—a classic example of cleavage. This direct observation helps them understand that minerals break in one of two ways: cleavage, which results in clean, flat planes, or fracture, which creates jagged, uneven breaks.

Sorting and Analyzing the Samples

After the outdoor portion, we head back to the classroom to analyze the pieces. Students sort their samples into two piles: those that show cleavage and those that exhibit fracture. This sorting activity reinforces their understanding of the two properties and allows them to work collaboratively to compare observations. By the end of the lesson, students have a solid grasp of how to differentiate between these two properties, and they’re able to explain their findings with confidence.

Why Calcite Works So Well

Calcite is an excellent mineral for this activity because of its predictable cleavage. It’s a soft mineral, making it easy to break with minimal effort, and its cleavage planes are clearly visible even to young learners. Additionally, having a tangible takeaway piece makes the experience more personal and engaging for the students.

Using Boom Cards for Review

To further reinforce the concepts, consider using my Boom Cards to help students review the properties of minerals. These interactive, self-checking digital task cards are great for preteaching content, ensuring absent students stay on track, or providing extra practice for those who need it. They make learning engaging and accessible, whether in the classroom or at home.

Wrapping Up

This activity is always a highlight of our science lessons, and it’s one that students remember long after the unit ends.

For those looking to use the lesson, I’ve created sorting mats for the properties of minerals to help students categorize and analyze mineral samples even further. These mats can be a great addition to your classroom and are available for download below. By engaging in hands-on learning, they’re able to connect theoretical concepts to real-world examples, making the properties of minerals more than just a list of definitions. If you’re teaching this topic, I highly recommend trying this activity with your class—it’s fun, educational, and guaranteed to leave a lasting impression!


Wednesday, January 1, 2025

πŸŽ‰ New Year, New Learning: Fresh Math Centers for 2025!

As we ring in 2025, it’s the perfect time to refresh our classrooms with exciting and engaging math centers that inspire students to dive deeper into learning. The new year offers a clean slate to introduce fresh activities that encourage hands-on exploration, foster critical thinking, and promote collaboration. Here are some creative and effective center ideas for 2025 that will make your classroom sparkle with energy and enthusiasm!

Fraction Frenzy Station

Fraction concepts can be challenging for many students, but with the right hands-on activities, fractions can be fun and approachable. Set up a “Fraction Frenzy” station where students use fraction strips, interactive digital tools, or fraction puzzles to explore equivalent fractions, adding and subtracting fractions, and even converting between fractions, decimals, and percentages. For an extra challenge, students can work in pairs or small groups to solve fraction riddles or create their own fraction challenges for others to solve.


Multiplication Escape Rooms

Escape rooms are all the rage, so why not incorporate them into your math centers? Create a multiplication-themed escape room with different task card problems that students need to solve to "unlock" the next set of task cards. The problems are based on whichever types of task cards you wish to use.


Measurement Exploration Zone

Create an engaging Measurement & Data Station where students can explore angles and convert customary units of measurement through hands-on activities. In this station, they’ll measure and identify different types of angles—acute, obtuse, and right—using protractors, anglegs, and fraction circles, while also applying their knowledge to real-life scenarios. Students can work together to solve problems like converting inches to feet or miles to yards, and even create their own angle-filled artwork with rulers and paper. By practicing these skills in pairs or small groups, students will gain a deeper understanding of measurement concepts in a fun, collaborative way.


Incorporating technology into your centers can bring a modern twist to your activities. Use tablets or interactive whiteboards to access educational apps and websites for practicing math skills, conducting virtual science experiments, or exploring virtual field trips to space, the rainforest, or the ocean. Allow students to work through simulations, games, and interactive lessons that make learning feel dynamic and current.

The key to successful math centers is fostering a collaborative and student-centered environment. Allow students to work in pairs or small groups to solve problems, share their findings, and reflect on their learning. Encourage students to teach each other and offer different perspectives on challenges they encounter. This type of peer learning not only builds teamwork skills but also reinforces understanding as students explain concepts to one another.

Final Thoughts

As we begin 2025, let’s embrace the opportunity to refresh our classroom centers with exciting, hands-on activities that promote active learning. These math centers will not only keep students engaged but also provide them with the tools and skills they need to thrive in the new year. So, let’s kick off 2025 with fresh, creative approaches to teaching and learning that make math and science come to life in exciting ways! πŸŽ‰

Monday, December 2, 2024

πŸŽ„Festive Fraction Fun {Free Math Craftivity}πŸŽ„


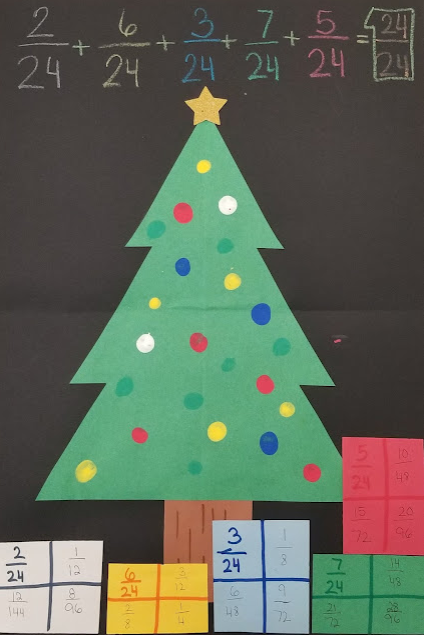
Each year, my 4th grade class embarks on a math adventure to turn a plain Christmas tree into a colorful tapestry of fractions.

The initial step involves finger-painting 24 ornaments onto the Christmas tree. Students love this part! (Just give into the messy fingers. If you put them all at one table by the sink, you'll survive.) Little do they know, the real mathematical exploration was just beginning.

Fraction Analysis: Once the ornaments are dry, the focus shifts to the world of fractions. Students will count ornaments of different colors, reaching the total of 24. The challenge is then to determine the fraction represented by each color. Each present below the tree should have the fraction of ornaments that are that color.

Equivalent Fractions Exploration: With basic fractions established, students now take a deeper dive into equivalent fractions. On each present, 3 equivalent fractions should be generated.

Equation Creation: The culminating activity involved the creation of equations demonstrating how they decomposed the whole tree. I like to use Crayola's Construction Paper Crayons to write the fractions so the colors really pop!

Finally, hang the masterpieces in the hall. Your principal will love the amount of math on them and the kids (and adults!) will love the festive feel they bring to your classroom.

store post


I hope that activity helps create some excitement in your classroom. I find it easiest to use one table for the "finger painting" station. While students are working on that, the rest of the class is completing centers within their small group.

store post

Saturday, November 9, 2024

πŸ¦ƒ Thanksgiving-Themed Review of Equivalent Fractions πŸ¦ƒ


 As Thanksgiving approaches, it's a perfect time to add some festive fun into your math lessons! This turkey-themed activity is a great way to review equivalent fractions while engaging students in creative, hands-on learning. We’ll combine a sorting and matching game with a craftivity and worksheets that cover multiple levels of understanding, including fractions, decimals, and percents. With differentiated options, this review suits a range of learners, ensuring every student is challenged at their own level. Let's dive into the details!

Turkey-Themed Center Activity: Equivalent Fractions Sorting Game

Objective: Help students understand and practice finding equivalent fractions using a fun, turkey-themed sorting game.

Materials Needed:

  • Turkey-themed fraction cards
  • Two different sets of fraction pairs for sorting (one easier and one more challenging)
  • Game board or sorting mats (featuring turkey feathers or plates)

How to Play:

  1. Divide your students into small groups.
  2. Hand out fraction cards to each group—some with simple fractions (like 1/2, 1/4, 1/8) and others with more complex fractions (like 3/6, 5/10, 9/12).
  3. The students will work together to match equivalent fractions from the easier set first.
  4. After mastering the first level, they can move on to the second set of cards for a greater challenge.
  5. Add a competitive edge by setting a timer and seeing which group can accurately match all their fraction pairs first!

This activity can be used as a center or even as a small-group instructional tool. It helps students visually connect equivalent fractions and deepens their conceptual understanding through peer discussion.

Thanksgiving Fraction Craftivity: Turkey Feather Fractions

In this craftivity, students will create their own turkey using fractions as the centerpiece! This creative task reinforces the concept of equivalent fractions while allowing students to express their artistic side.

Materials Needed:

  • Turkey templates (with a large circle for the body)
  • Construction paper feathers
  • Markers, scissors, glue

How to Create:

  1. Each student starts with a turkey body. They'll write a fraction on the turkey (e.g., 1/2, 3/4, or 5/6).
  2. On the feathers, they will label equivalent fractions. For instance, if the body says "1/2," they might label the feathers with 2/4, 3/6, 4/8, etc.
  3. After all feathers are labeled, students can decorate their turkeys and proudly display them around the classroom.
  4. As a class discussion, students can present their turkeys and explain how they identified their equivalent fractions.

This activity works as a great anchor for your classroom fraction wall or Thanksgiving-themed bulletin board!

Three Worksheets for Independent Practice

To solidify students' learning, you can use these three worksheets as follow-up activities. Each worksheet increases in difficulty to ensure all students are engaged at the right level:

  1. Equivalent Fractions Worksheet (Students Generate Fractions)
    Students will be given a fraction and asked to generate as many equivalent fractions as they can. This allows them to practice multiplying the numerator and denominator by the same number, which reinforces the concept that equivalent fractions represent the same value.

  2. Equivalent Fractions Worksheet (Fill in the Missing Numerator or Denominator)
    This worksheet presents incomplete fraction pairs where either the numerator or denominator is missing. Students must figure out what number is needed to make the fractions equivalent. This task focuses on understanding the relationship between the parts of a fraction.

  3. Equivalent Fractions, Decimals, and Percents Worksheet
    In this final worksheet, students will convert between fractions, decimals, and percents. For example, they may need to convert 1/2 to 0.5 and then to 50%. This will push their understanding beyond fractions and show them how these concepts connect to real-world applications.

Incorporating Differentiation

For students who need a challenge, you can increase the complexity of the fractions used in the sorting game or assign the more difficult worksheet options. For struggling learners, keep the fractions simple and provide extra support through manipulatives or visual aids during the center activity.


This Thanksgiving-themed review of equivalent fractions offers both rigorous content and festive fun. Students will enjoy the turkey-themed games and craft while deepening their understanding of a foundational math concept. By incorporating differentiated activities and creative projects, you can make math review a highlight of the holiday season!

How do you plan to incorporate Thanksgiving fun into your math lessons this year? Let me know in the comments below!

Thursday, October 17, 2024

πŸ‘» Haunted House of Multiplication Methods {Free Math Craftivity} πŸ‘»

Teaching multiplication can be a challenging task, but it becomes more exciting when we incorporate hands-on activities that help students visualize and apply their knowledge in different ways. One effective and creative way to solidify understanding is by practicing various forms of multiplication and then creating a craft that brings these methods to life. In this activity, students will practice the distributive property, arrays/box method, partial products, and the standard algorithm, all while crafting a haunted house. This is not only a fun and memorable learning experience but also makes for an eye-catching display for Parent Night.

Materials Needed:

  • Construction paper (various colors)
  • Scissors
  • Glue
  • Markers or colored pencils
  • Rulers (optional for neat lines)

Step 1: Review Multiplication Strategies

Before diving into the craft, ensure your students have a solid grasp of the different multiplication methods. Here’s a quick recap of the strategies:

  1. Distributive Property: Break down one of the factors to make the multiplication easier. For example, 12 × 3 can be split into (10 × 3) + (2 × 3)

    12 x 3
    (10 × 3) + (2 × 3)
    30 + 6
    36

  2. Arrays/Box Method: Use a visual representation where numbers are broken into their place values, and the partial products are calculated inside a grid or box. For example, multiplying 23 × 7 can be represented as a 2x2 grid for 20 and 3.


  3. Partial Products: Break the multiplication into parts by multiplying each digit of the numbers, then adding the partial results. For instance, with 34 × 6, multiply 30 × 6 and 4 × 6, then add the products.


  4. Standard Algorithm: The traditional method where you multiply the digits starting from the ones place, carrying over as necessary, and then adding the products.

Step 2: Introduce the Haunted House Craft

Explain to students that they will be creating a haunted house where the same multiplication problem is solved in four different ways. The multiplication problem itself will be written on the roof, and each window will display one of the methods of solving it.


Step 3: Building the Haunted House

  • Cut Out the Shapes: Students will start by cutting out a large square (or rectangle) for the base of the haunted house. Then, they will cut a trapezoid for the roof, which will hold the multiplication problem.

  • Add Windows: Students should cut out four smaller squares or rectangles for the windows of the house. Each window will be used to display one of the four methods of solving the multiplication problem. Students could also make the windows "open" by creating a folded window.

Step 4: Solving the Multiplication Problem in Different Ways

Each student will choose a multiplication problem to solve. For example, let’s use 12 × 5. Students will solve this problem in the following ways, writing each solution on a different window:

  1. Window 1: Distributive Property (e.g., 10 × 5 + 2 × 5).
  2. Window 2: Box Method (drawing the box and splitting numbers by place value).
  3. Window 3: Partial Products (breaking down the multiplication step by step).
  4. Window 4: Standard Algorithm (solving it the traditional way).

Encourage students to decorate the windows to match the "haunted house" theme—perhaps using spooky borders or eerie designs.

Step 5: Assemble and Decorate

  • Glue the Pieces: Once students have completed the windows with their different methods, they will glue the trapezoid (roof) on top of the square base and attach the windows underneath the roof.

  • Personalize: Students can decorate the house to look haunted, using construction paper or markers to add features like spooky trees, ghosts, or bats.

Step 6: Parent Night Display

Once all the haunted houses are completed, display them around the classroom or on bulletin boards for Parent Night. Each house will showcase how students can approach the same problem in multiple ways, illustrating their deep understanding of multiplication.

Why This Activity Works:

  • Differentiation: This activity caters to different learning styles, as students practice multiple ways of solving multiplication problems.

  • Creativity: It taps into students’ creative side, making math more engaging and memorable.

  • Visual Learning: The haunted house craft provides a visual representation of abstract math concepts, which can be especially helpful for students who benefit from seeing math in different forms.

  • Parent Engagement: The final product is a fun, thematic display that parents will love to see during Parent Night, giving them a glimpse into what their child has been learning.

Final Thoughts:

Multiplication doesn't have to be monotonous. With this Haunted House Multiplication Craft, your students can practice key math skills in a fun, hands-on way while showing off their work in an impressive display. This activity not only reinforces important multiplication strategies but also encourages creativity, making it the perfect blend of education and fun! 


Tuesday, September 17, 2024

πŸ‚ Falling Factors (Math Craftivity) πŸ‚


If you’re looking to make learning about factors exciting and visually engaging for your students, look no further! The Factor Tree Craft is a hands-on activity that not only teaches students how to find factors of large numbers but also allows them to showcase their creativity. This craft is perfect for classroom displays and will make a fantastic centerpiece for parent night.

Why the Factor Tree Craft?

Understanding factors can sometimes be challenging for students. By integrating this concept into a creative craft project, you’ll help students grasp the idea more effectively and have fun in the process. Plus, their finished projects will make a colorful and engaging display for parents and visitors.

Materials Needed

To get started, gather the following materials:

  • Construction paper (a background piece and fall colors for the leaves)
  • Markers or colored pencils
  • Scissors
  • Glue

Step-by-Step Guide

1. Introduce Factors

Begin your lesson by reviewing the concept of factors with your students. Remind student that factors are numbers that multiply together to produce another number. For example, for the number 63, factors include:

  • 1 × 63
  • 3 × 21
  • 7 × 9

Make a list of these factors on the board, showing how they come in pairs.

2. Create the Factor Tree

Hand out a piece of brown construction paper to each student. Instruct them to draw or cut out a tree trunk and branches. On the tree, they should write the large number they are working with—63 in this case.

3. Prepare the Factor Leaves

Next, provide construction paper for students to cut out leaf shapes. On each leaf, they will write one of the factors of the number. Each factor pair should be the same color. For example, one leaf might have "1," another "63," and so forth. Ensure that all factors of the number are included.

4. Assemble the Tree

Students should glue or tape the leaves on the paper as if they are falling from their tree. 

5. Add Decorations

Allow students to decorate their crafts. This not only makes the projects more visually appealing but also adds a personal touch to each tree or scene.

Advanced Variations

For more advanced learners, consider these variations:

  • Use larger or more complex numbers for factoring.
  • Create a “Factor Forest” where each tree represents a different number, adding a layer of complexity to the project.

Perfect for Parent Night

Once the Factor Trees are completed, display them around the classroom or create a bulletin board exhibit titled “Our Factor Forest.” This display will be a delightful and educational highlight for parent night, showcasing both your students' understanding and their artistic talents.

Why This Craft Works

The Factor Tree Craft effectively combines math and creativity, making abstract concepts more concrete. It caters to different learning styles—visual and kinesthetic learners will particularly benefit. By seeing their factors represented visually, students can better understand the relationships between numbers.

Conclusion

The Factor Tree Craft is a fun and educational way to teach your students about factors. It encourages creativity while reinforcing important math concepts. Plus, it makes for a beautiful and engaging display that parents will love. Give this craft a try in your classroom, and watch your students’ math skills flourish!

Need More Factor Activities?