Showing posts with label Science. Show all posts

Tuesday, July 7, 2026

How to Teach Observations, Inferences, and Conclusions in 4th Grade Science

SC.4.N.1.1 & SC.4.N.1.6


If there’s one mistake I made early on with this benchmark, it was treating it like a one-week science lesson. We’d define observations and inferences, do a quick activity, maybe give a grade, and move on. Then a few weeks later, during a completely different science unit, students were right back to mixing everything together again. That’s when it clicked for me: this isn’t a lesson you finish. It’s a thinking skill students build over time. Observations, inferences, and conclusions only stick when students practice them repeatedly in real science—not just during a vocabulary week in August.

So instead of isolating SC.4.N.1.1 and SC.4.N.1.6, I weave them into everything we do in science.

Do This Tomorrow (Start Here)


Put a ladybug larva under your document camera. (See picture to the right.)

Have students:
  • Draw exactly what they see (detailed, not a “cartoon bug”)
  • Label at least three observations
  • Write one inference about what they think it might turn into
  • Repeat this over several days as the organism changes
At first, students usually have no idea what they’re looking at. That’s actually the point. They’re forced to rely only on what they observe, not what they already know.

Over time, their drawings become more detailed, their observations become more specific, and their inferences start to shift as new evidence appears.

By the end, you get one of the best science conversations you’ll ever hear:

“We thought it was this… but now we think something different because of what we observed.”

That’s scientific thinking.

Teaching This Benchmark (When You Explicitly Introduce It)


Even though this is a skill I embed all year, I do spend time early on explicitly teaching it so students understand the vocabulary and expectations. When I do, I don’t treat it like memorizing definitions. I treat it like practicing how scientists think using real examples from the natural world.

Here are three activities I use during that instruction.

🐦 Bird Foot Detectives

I start with a close-up image of a bird’s foot—no full bird, no context. We begin by building observations together:
  • toes
  • claws
  • webbing
  • texture
  • shape
Then I ask students to make inferences:

What do you think this bird uses its feet for?

Students usually suggest swimming, grabbing prey, climbing, or walking on different surfaces. The important part is not whether they are correct, but whether they can support their thinking with evidence from what they observed.

Finally, we reveal the full bird and write a conclusion: Based on the webbed feet, I conclude this bird is adapted for swimming.

This is where students start to understand the difference between guessing and using evidence.

🦷 Animal Teeth Detectives

Next, I show only the teeth of an animal. We repeat the same structure.

Students record detailed observations:
  • sharp
  • flat
  • pointed
  • spacing
  • size
Then they make inferences about diet. 

Finally, they write a conclusion: The shape of the teeth provides evidence that this animal eats meat.

What I like about this activity is that students often think they already know the answer—but now they have to justify it using observations instead of just saying it.

That shift is the whole point.

🌱 Seed Detectives

This is one of my favorite ways to connect observation skills to the natural world. If I have real seeds available, I use them. If not, pictures work just fine.

Students observe different seeds and record details like:
  • wings
  • hooks
  • fluff
  • thickness
  • shape
Then I ask: How do you think this seed travels from place to place?

Students make inferences based on structure: wind, animals, water, or gravity.

Finally, they write a conclusion supported by evidence: Based on the wings, I conclude this seed is dispersed by wind.

This is one of the clearest ways for students to see that structure and function are connected in science.

Where Students Struggle


The hardest part of this benchmark is not making observations. It’s organizing those observations into clear thinking. Many students rush straight to answers without writing down what they actually see first. Others give very vague descriptions like “it looks weird” instead of specific details. And writing is often the biggest hurdle. Some students shut down completely when asked to turn their thinking into sentences. That’s why I treat drawings as part of scientific writing. A detailed, labeled sketch often communicates more scientific thinking than a rushed paragraph.

How I Support Students


Over time, I’ve found a few supports that make a big difference.

We use sentence starters like:
  • I observed…
  • I infer…
  • Based on the evidence, I conclude…
Science notebooks are where everything lives—drawings, notes, and reflections all in one place.

Think-Pair-Share helps students generate ideas, but I always bring it back to individual writing so each student practices expressing their own thinking.

And one thing I remind students often: If your page is blank, nothing can improve it. We start messy. Then we refine.

How This Shows Up All Year


This is not a one-unit skill. Any time students observe something in science, they can practice:
  • recording what they see
  • making an inference
  • writing a conclusion based on evidence
That’s why I don’t isolate this benchmark into a single week. It shows up in every unit, over and over again, until it becomes a habit.

Common Mistake to Avoid


Don’t treat observations and inferences as a one-and-done lesson. Students don’t internalize this skill after a single activity. They develop it through repeated exposure across the entire year. Every investigation gives them another chance to strengthen their thinking. That repetition is what makes it stick.

Tools I Use When I’m Teaching This Skill


Once students understand observations, inferences, and conclusions, the next step is giving them repeated opportunities to practice it in different formats throughout the year. I don’t create something new every time we revisit this skill—I reuse a few reliable resources that naturally fit into science instruction without adding extra prep.

🧠 Boom Cards for Quick Practice

When I want students to practice distinguishing between observations and inferences in a focused way, I use Boom Cards.

They’re especially helpful during:
  • small group instruction
  • review days
  • or quick check-ins after an investigation


What I like about Boom Cards here is that they don’t replace hands-on science—they reinforce the thinking after students have already experienced it.

🔬 Mystery Science Labs for Real Investigation Practice

When I want students doing actual science instead of just identifying vocabulary, I use my Mystery Science Labs. These are designed around the idea that students should:
  • observe carefully
  • record evidence
  • make inferences
  • and support conclusions without relying on a scripted scientific method
They work really well for this benchmark because students are constantly practicing observation and reasoning in context.


Final Thought


If students leave your classroom with one habit from this benchmark, let it be this:
  • They don’t just look at something and guess.
  • They observe carefully.
  • They think about what the evidence suggests.
  • And they explain their thinking using what they can actually point to.
  • That’s what scientists do.
And the best part is—you don’t need a separate unit to teach it. You just need repeated chances for students to notice, think, and explain all year long.

Wednesday, July 1, 2026

Why Nature of Science Is the Most Important Unit You'll Teach All Year

This is an overview article for the Nature of Science series. Each upcoming post will break down specific benchmarks into practical, classroom-ready strategies.

If you ask a room full of fourth-grade teachers which science unit they're least excited to teach, I have a feeling many would answer: Nature of Science.

I get it.

It’s vocabulary heavy. It feels abstract. Students are barely settled into fourth grade, and suddenly we’re asking them to distinguish between observations and inferences, identify variables, explain why an investigation was or wasn’t fair, and understand how scientists gather evidence.

It’s a lot.

For years, Nature of Science was probably my least favorite unit to teach, too.

Then something changed.

After spending more than 20 years teaching fourth-grade science, I realized something important:

Nature of Science isn’t just another unit in the curriculum.

It’s the foundation for everything that comes after it.

Every investigation. Every lab. Every science notebook entry. Every discussion about weather, energy, plants, rocks, ecosystems, or electricity depends on students understanding how scientists think and work.

Without that foundation, the content benchmarks become much harder to teach—and much harder for students to grasp.

Fourth Graders Aren’t Really Fourth Graders Yet

One of the biggest mistakes we make is forgetting where our students are coming from.

Many students enter fourth grade with very little science background. Some have had wonderful third-grade experiences full of hands-on investigations. Others have had very little science instruction because reading and math naturally took priority.

On top of that, it’s the beginning of the school year.

They’re still learning classroom routines.

They’re still learning how to use a science notebook.

They’re still learning how to work with partners.

They’re still learning how to share materials without arguing over who gets to hold the magnifying glass.

They’re still learning how to record observations instead of saying, “I already know.”

In other words, they’re still learning how to be scientists.

As teachers, we often expect students to think like scientists before they’ve had the opportunity to practice acting like scientists.

The Hidden Curriculum Nobody Talks About

When we look at the benchmarks, we see words like:

  • variables
  • observations
  • inferences
  • evidence
  • investigations

What the benchmarks don’t tell us is everything else we’re teaching at the same time.

We’re also teaching students to:

  • organize a science notebook they’ll use all year
  • follow multi-step directions
  • cooperate during investigations
  • handle materials responsibly
  • record information carefully
  • listen to different ideas respectfully
  • support answers with evidence instead of guesses

Those skills don’t happen overnight.

They’re built little by little through consistent practice.

In many ways, teaching these habits is just as important as teaching the vocabulary itself.

Science Is More Than the Scientific Method

One misconception I see every year is the idea that science is simply following the Scientific Method.

Ask many students what scientists do, and they’ll immediately list the familiar steps:

  1. Ask a question.
  2. Make a hypothesis.
  3. Conduct an experiment.
  4. Draw a conclusion.

While those are certainly important skills, they’re only one part of science.

Scientists also spend enormous amounts of time observing.

  • Astronomers observe the night sky.
  • Meteorologists observe weather patterns.
  • Marine biologists observe animal behavior.
  • Paleontologists observe fossils left behind millions of years ago.

Not every scientific question can be answered with a controlled experiment.

Helping students understand that science is really about curiosity, careful observation, asking questions, collecting evidence, and communicating discoveries creates a much richer understanding of what science actually is.

Why Students Struggle

Nature of Science asks students to think differently than they have before.

Instead of memorizing facts, they’re asked to analyze situations, evaluate evidence, identify mistakes in investigations, and explain their thinking.

For many students, that’s difficult.

Some are still developing reading skills.

Others can read fluently but haven’t had much practice analyzing what they read.

Many assessment questions present students with a scenario and ask them to apply what they know instead of simply recalling a definition.

That’s a big leap for nine- and ten-year-olds.

The good news is that these thinking skills improve with practice.

The more opportunities students have to discuss investigations, explain their reasoning, and justify their answers with evidence, the more confident they become.

The Goal Isn’t Memorization

When I think about what I want students to remember from this unit, it isn’t a long list of vocabulary words.

I want them to understand that:

  • scientists are curious
  • scientists ask questions
  • scientists make careful observations
  • scientists collect evidence
  • scientists change their thinking when new evidence is discovered

If students leave this unit understanding those ideas, every science benchmark that follows becomes easier to teach—because students begin approaching science like scientists.

And that’s really what Nature of Science is all about.

🔬 From My Classroom

Lessons I’ve learned after 20 years teaching Florida science.

If I could give one piece of advice to a new fourth-grade science teacher, it would be this:

Don’t rush through Nature of Science just because you’re eager to get to the “fun stuff.”

Nature of Science is the fun stuff.

It’s where students learn how to think, question, investigate, and wonder.

Every great science lesson you’ll teach this year is built on the foundation you create during these first few weeks.

Take your time.

It will pay off for the rest of the year.

🎯 What Students Really Need to Know

The essential understanding students should leave with.

Students don’t need to memorize every vocabulary definition perfectly right away.

They do need to understand that science is a process of thinking, observing, and using evidence—not just following a list of steps or guessing answers.

⚠️ Common Misconception

A mistake students make every year—and how to prevent it.

Students often believe science always follows a fixed “recipe” called the Scientific Method.

They also frequently think that if their hypothesis is wrong, the experiment failed.

In reality, scientists learn just as much—if not more—from results that don’t match their predictions. 

💡 Try This Tomorrow

A quick activity you can use in your classroom.

🧰 Materials

  • Paper lunch bag (1 per group or teacher demo)
  • 1 common object per bag (spoon, eraser, rock, crayon, paperclip, small toy, etc.)
  • Optional: tape or fold to seal bag
  • Student notebook or recording sheet
  • Pencil

👩‍🏫 Setup

  1. Place one object inside each paper bag and seal it so students cannot see inside.
  2. Explain to students:
  3. “You are NOT allowed to open the bag or look inside.”
  4. Then explain what they can do:

  • gently pick up the bag
  • carefully shake it
  • listen for sounds
  • observe the shape of the bag
  • feel the weight and texture from the outside

(Model this once if needed.)

📋 Directions

  1. Give each group a sealed paper bag.
  2. Allow students 1–2 minutes to observe the bag using ONLY their senses (no opening it).
  3. Have students write three observations:
  • sound (if any)
  • weight (heavy/light)
  • shape/feel (round, rigid, soft, etc.)
  1. Have students write one inference about what they think is inside.
  2. Require students to include evidence from their observations to support their inference.

💬 Discussion Questions

  • What did you actually observe using your senses?
  • Which ideas were observations vs. inferences?
  • Did anyone make a different inference using the same evidence?
  • Why can scientists interpret the same evidence differently?

🔁 Optional Extension (Reveal + Compare)

Open the bags and reveal the objects.

Then ask:

  • Were your inferences supported by your observations?
  • What evidence was strongest?
  • Would you change your inference now? Why?
  • Why this works

This is not a guessing game.

It teaches students that:

  • observations come from evidence gathered through the senses
  • inferences are interpretations of that evidence
  • different scientists can interpret the same evidence differently
  • strong scientific thinking always connects back to evidence

Thursday, July 24, 2025

🎄 Christmas in July: $1 Deals Teachers Will Love!


 It may be hot outside, but I’m bringing the holiday cheer early with a Christmas in July Sale you don’t want to miss! Whether you're prepping for the new school year or stocking up on engaging review materials, now’s the perfect time to grab two of my top-rated resources—for just $1 each!

I’ve handpicked these based on what teachers use again and again to make learning meaningful, independent, and easy to differentiate.


➗ Math Ladder: 4-Digit by 1-Digit Division Practice


If you’ve used a Math Ladder before, you already know how powerful it is for targeted practice. If not, let me introduce you to one of my favorite ways to give students independent, skill-specific work that actually sticks.

This Division Math Ladder focuses on 4-digit by 1-digit division problems written in a horizontal format, encouraging students to line up digits properly before solving. That extra step builds accountability and number sense.

What’s included?

  • Multiple leveled pages that progress in difficulty

  • Built-in self-checking feature

  • A tool that works digitally or on paper

  • Easy-to-follow format for independent or partner practice

Whether you're introducing division, reviewing it, or filling gaps from last year, this Math Ladder makes differentiation simple. Just assign the level each student needs and let them climb from there!


💻 Boom Cards: 4th Grade Science Benchmark Review


This one’s a teacher lifesaver—especially for 4th and 5th grade teachers!

In 4th grade, students are taught science standards that won’t be explicitly retaught—but will absolutely show up on 5th grade tests. That’s where this Boom Card deck comes in.

It’s a self-paced, self-checking review that reinforces essential life science concepts like adaptations, inherited traits, and learned behaviors. Students love the interactive format, and teachers love the no-prep practice that actually helps them retain what they’ve learned.

Use this deck for:
✔️ Independent review
✔️ Small group rotations
✔️ Test prep in 5th grade
✔️ Quick checks for understanding

It’s an easy win in any science classroom.


🎁 Don’t Miss Out—These $1 Deals Won’t Last!

Whether you're planning ahead or plugging gaps, these two resources are classroom staples—and now they’re just $1 each during my Christmas in July Sale!


Thursday, June 12, 2025

Last Week of School Science Activities

Wondering how to make the last days of school memorable?

Check out my Mystery Science Labs II - an intriguing set of mini-labs centered around Florida 4th Grade benchmarks needed for the 5th Grade Science FCAT. Mystery Science Labs III is a mini set of labs for a shorter class period. The original set of Mystery Science Labs contains 11 mini exploration stations to help students explore the world around them and apply their powers of observation.

Or maybe you want to jump into the world of owl pellets! This product is not meant to be a comprehensive unit designed to get your class ready for a test. This is a fun project for the end of the school year – after testing is over, but before you’re allowed to start showing movies and having all day recess.

Then again, you might be trying to collect make up work from a couple of students and need to keep the rest of the class busy while doing so. Try letting the rest of the class create their own investigation using magnets from your physical science kit and using the free template below.

Tuesday, February 11, 2025

Exploring Mineral Properties: A Hands-On Activity for Hardness

Learning about the hardness of minerals provides an exciting opportunity for students to practice scientific testing and observation. This hands-on activity introduces students to the concept of mineral hardness and how it helps identify different minerals. Using a simple series of scratch tests, students will sort their samples into categories and record their findings, all while deepening their understanding of this key mineral property.

Start the lesson by watching the video clip on mineral hardness, which explains how some minerals can be easily scratched by a fingernail, while others are much harder and resist scratching altogether. Use this as a discussion starter, asking students why hardness might be an important characteristic in identifying minerals. 

After the discussion, students will test the hardness of their mineral samples by following a sequence of scratch tests. First, use a fingernail to try to scratch the surface of the mineral. If the sample is scratched, place it in the Soft column and do not test it further to avoid damaging the sample. Next, test the remaining samples with a penny. If the penny scratches the mineral, place it in the Medium column. For those not scratched by the penny, use a steel nail. Minerals scratched by the nail belong in the Hard column. Any samples that cannot be scratched by any of the tools can be categorized as Very Hard.

As students work, have them record their observations on the Mineral Properties Recording Sheet, noting the tools used and the results of each test. This systematic approach not only teaches the concept of hardness but also reinforces the importance of careful observation and accurate data recording. By engaging in this activity, students gain a hands-on understanding of mineral hardness while applying scientific methods in a fun and interactive way!

Using Boom Cards for Review

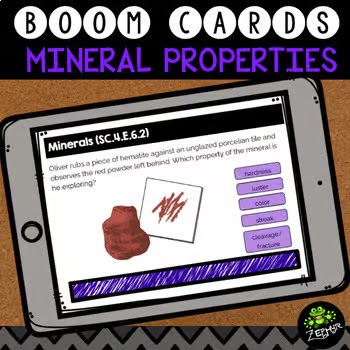
Enhance your students’ understanding of mineral properties with my Boom Cards, designed to make review both interactive and effective. These self-checking digital task cards are perfect for preteaching key concepts, helping absent students catch up, or offering extra practice for those who need it. Whether in the classroom or at home, they provide a fun and accessible way to reinforce learning and build confidence.

Wrapping Up

If you’re planning to teach about mineral properties, I’ve created sorting mats to help students take their learning further by categorizing and analyzing mineral samples. These mats are a valuable resource for any classroom and can be downloaded below. By incorporating hands-on activities, students can connect theoretical knowledge to real-world examples, making mineral properties more engaging and meaningful. This activity is a fun and educational way to bring science to life, and I highly recommend giving it a try with your class!


Sunday, February 9, 2025

Weathering with Conversation Hearts: A Sweet Science Experiment


Understanding weathering—the process that breaks down rocks into smaller pieces over time—is a fundamental concept in earth science. With this simple and engaging experiment, students can observe mechanical weathering in action using Conversation Hearts candy. This hands-on activity is perfect for demonstrating how rocks break down due to physical forces like wind, water, and abrasion.

Materials Needed:

  • Conversation Hearts candy (or any small, solid candy)

  • Small container with a lid (such as a plastic food storage container)

  • Small pebbles or aquarium gravel

  • Paper and pencil for observations

Procedure:

  1. Initial Observations: Give each student a few Conversation Hearts. Have them examine the hearts carefully, noting their shape, color, and any imprinted messages. Students can record their observations in a science journal.

  2. Simulating Weathering: Place the Conversation Hearts in the container along with a handful of small pebbles or aquarium gravel. Secure the lid tightly. Instruct students to shake the container vigorously for about 30 seconds to 1 minute. The pebbles act like natural forces such as wind and water that cause rocks to collide and wear down over time.

  3. Observing Changes: After shaking, pour out the Conversation Hearts onto a tray or paper towel. Have students observe and record how the candy has changed. They should notice that the edges may have softened, colors may have faded, and small fragments may have broken off.

  4. Discussion and Connection to Weathering: Discuss with students how this experiment models mechanical weathering. Explain that, just like the candy pieces breaking down due to friction and impact, rocks in nature are weathered by physical forces like flowing water, wind, and ice.

Extension Ideas:

  • Time Variation: Have students shake the container for different lengths of time and compare results.

  • Different Materials: Try using different types of candy to see if some weather faster than others.

  • Real-World Connections: Show images of weathered rock formations, such as smooth river stones or eroded cliffs, to help students connect their observations to real geological processes.

This simple yet effective experiment brings an abstract concept to life in a way that’s engaging and memorable for students. Plus, it’s a great excuse to use some extra candy after Valentine’s Day!

Need a review activity? Check out my Science Boom Cards - a no prep, self-checking digital activity for students to use either in the classroom (fast finishers) or at home for extra study time.


Tuesday, February 4, 2025

Exploring Mineral Properties: A Hands-On Activity for Streak

Understanding the streak of a mineral is a fascinating way for students to explore its unique properties and practice scientific observation. This hands-on activity guides students through performing streak tests on their mineral samples, using video instruction to enhance their learning. By combining visual aids and interactive exploration, this activity helps students grasp the concept of streak while honing their observation and recording skills.

Streak

Start by introducing the concept of streak with the video clip included in the resource. Use this as a discussion starter, emphasizing that a mineral's streak is the color of the powder it leaves behind when scratched across a streak plate. Unlike the mineral's external color, its streak provides a more consistent clue to its identity. Highlight that some minerals, like pyrite (fool’s gold), can have a streak color that differs significantly from their outward appearance.

To perform the streak test, ensure the classroom is equipped with both white and black streak plates. Having both types allows students to easily see the powder trail left behind, especially for lighter or darker minerals. After watching the video, students will carefully rub their mineral samples across the plates, noting the color of the streak in their Mineral Properties Recording Sheet. Remind them to handle the plates gently and to test each mineral on both colors to ensure accurate observations.

This activity not only teaches students about streak as a reliable mineral property but also underscores the importance of hands-on learning and scientific inquiry. By encouraging discussion, careful testing, and accurate recording, teachers can foster curiosity and critical thinking in their students—key skills for budding geologists and scientists.

Using Boom Cards for Review

To help students review the properties of minerals, try using my Boom Cards for an interactive and engaging experience. These self-checking digital task cards are ideal for preteaching concepts, helping absent students catch up, or providing extra practice for those who need it. Whether used in the classroom or at home, they offer a fun and effective way to make learning accessible for all students.

Wrapping Up

If you’re planning to teach about the properties of minerals, I’ve designed sorting mats to help students dive deeper into categorizing and analyzing their mineral samples. These mats are an excellent tool for hands-on learning and can be downloaded below to enhance your lesson. By actively engaging with real-world examples, students can bridge the gap between theoretical concepts and practical application, making the study of mineral properties more meaningful. This activity is not only educational but also a fun and memorable way to bring science to life in your classroom!


Thursday, January 30, 2025

Mass and Volume: Why Same Volume Doesn't Mean Same Mass


When it comes to teaching about mass and volume, one of the most important concepts for students to grasp is that the two aren't always directly related. A great way to help students understand this is by comparing objects that have the same volume but different masses. A perfect example is comparing a soccer ball to a bowling ball. At first glance, both objects may seem to have similar sizes, but when students hold them, they will quickly realize that their masses are very different.

The Soccer Ball vs. The Bowling Ball

Start by showing students a soccer ball and a bowling ball. While they may appear to be the same size, the mass of the bowling ball is far greater. This hands-on activity helps students visualize that two objects with the same volume (or size) can have very different masses because of the materials they are made from. The soccer ball is light and filled with air, while the bowling ball is dense and solid.

To make the activity even more interactive, consider obtaining a bowling ball from a local bowling alley. Many bowling alleys are happy to give away old, damaged bowling balls for free. This can make the experiment both cost-effective and engaging for your students. Having students physically compare the two objects will spark curiosity and provide a deeper understanding of how different materials impact an object's mass, regardless of its size.

After observing the soccer and bowling balls, students should take time to write & draw their observations in order to help make the content "stick." These drawings could be done in their science journals or on larger sheets of construction paper as something to hang in your hallway.

Challenge students to find other objects that have the same volume, but different masses. (Or similar mass, but different volumes.) Those that meet this challenge could add this information to their drawings above.

Key Takeaways for Students:

  • Volume refers to how much space an object takes up. Two objects can have the same volume but different masses.
  • Mass refers to how much matter is in an object. The mass of an object is determined by the material it is made from, not just its size.
  • Objects like the soccer ball and bowling ball can have similar volumes, but because the materials differ, their masses are not the same.

By the end of this activity, students should be able to explain why objects with the same volume can have different masses and better understand the relationship between mass and volume. This hands-on lesson will provide them with the tools to explore these concepts in more depth and apply their learning in real-world scenarios.

Remember, sometimes the best way to teach science is through real-world examples that students can touch and feel. It makes the concepts tangible and exciting for them!

Need a Review?

To further reinforce the concepts of mass and volume, consider using Matter Boom Cards as a fun and interactive review activity! These digital task cards provide instant feedback and are perfect for reinforcing the properties of matter, including mass & volume. Students will love the engaging format, and the instant feedback ensures they understand key concepts while keeping track of their progress. With the ability to assign them digitally, Matter Boom Cards make a seamless addition to any classroom—whether you're reviewing in person or virtually. Perfect for reinforcing what students have learned, these cards help ensure mastery in a hands-on, tech-friendly way.


Monday, January 27, 2025

Exploring Mineral Properties: A Hands-On Activity for Color and Luster

Teaching students about mineral properties becomes exciting and interactive with this hands-on activity focusing on color and luster. Using the video clip in the file below as a discussion tool, students will observe, analyze, and record these properties for their mineral samples, gaining a deeper understanding of how scientists classify minerals. This activity is perfect for introducing key mineral concepts while emphasizing the importance of accurate scientific observation.

Color

Begin by exploring color, one of the most noticeable but least reliable mineral properties. Discuss how minerals like calcite and quartz can share the same color, or how a single mineral, like fluorite, can occur in a variety of hues—purple, green, white, yellow, and more. Have students carefully observe their classroom mineral samples, noting their colors on the Mineral Properties Recording Sheet. Afterward, watch the video clip included in the resource, which explains why color alone is not sufficient for identifying minerals. Use this as a springboard for classroom discussion about observation limitations and variability in nature.

Luster

Next, move on to the property of luster by watching the corresponding video clip, which introduces the categories of luster: metallic, glassy, waxy/semi-shiny, and earthy/dull. Using the Luster Sorting Mat, have students place all their mineral samples into a single pile. Work together to sort the samples into categories based on their luster. First, identify and group all metallic minerals. Then, move on to the glassy, waxy, and earthy samples, discussing the defining characteristics of each category as you go. Students should record their findings on the Mineral Properties Recording Sheet, building a comprehensive profile for each sample.

By combining video instruction with hands-on sorting and observation, this activity helps students develop critical thinking and classification skills. It also reinforces the importance of using multiple properties to identify minerals, laying a strong foundation for future scientific exploration.

Using Boom Cards for Review

For an engaging way to reinforce the concepts, try using my Boom Cards to help students review the properties of minerals. These interactive, self-checking digital task cards are perfect for preteaching key content, helping absent students catch up, or giving extra practice to those who need it. Whether used in the classroom or at home, these cards make learning both fun and accessible for all students.


Wrapping Up

To enhance your lesson on mineral properties, I’ve created sorting mats designed to help students categorize and analyze mineral samples in greater detail. These mats are a valuable addition to any classroom and can be downloaded below. Through hands-on learning, students can bridge the gap between theory and practice, transforming the properties of minerals into an engaging and interactive experience. If you’re teaching this topic, I highly encourage you to try this activity—it’s educational, enjoyable, and sure to make a lasting impact on your students!


Monday, January 20, 2025

Exploring Mineral Properties: A Hands-On Activity for Breakage


Teaching the properties of minerals is one of my favorite science lessons! It’s exciting to see students engage with real-world examples, and I’m lucky that it aligns perfectly with Florida’s 4th grade science standards. Even better, my 5th grade colleagues have asked me to focus on this topic as part of the Florida Science FCAT review, so I get the chance to dive deep into this fascinating subject. This post is part of a new series on my blog where I explore hands-on activities for teaching the properties of minerals.

Hands-On Learning with Mineral Samples

To make this topic come alive, we dedicate an entire week to observing and testing mineral samples. The school provides a variety of samples, but I’ve added a few extras to ensure we have a diverse collection. Students get the opportunity to explore key properties like luster, hardness, streak, and more. However, one concept that consistently challenges them is studying the property of breakage, specifically how minerals break with either cleavage or fracture.

Cleavage vs. Fracture: A Memorable Lesson

To help clarify this tricky concept, I take the students outside for a special hands-on activity. Using 4oz hammers (use the Kids Workshop ones available from Lowes), they break apart pieces of calcite, which is readily available on Amazon and perfect for this lesson due to its predictable cleavage patterns. The excitement in the air is palpable as students take turns observing and participating in the process. Each student gets to keep a small piece of calcite, which makes the activity even more memorable.

During the activity, I emphasize safety, providing goggles to ensure everyone stays protected. As the students break apart the calcite, they see firsthand how it splits cleanly along flat planes—a classic example of cleavage. This direct observation helps them understand that minerals break in one of two ways: cleavage, which results in clean, flat planes, or fracture, which creates jagged, uneven breaks.

Sorting and Analyzing the Samples

After the outdoor portion, we head back to the classroom to analyze the pieces. Students sort their samples into two piles: those that show cleavage and those that exhibit fracture. This sorting activity reinforces their understanding of the two properties and allows them to work collaboratively to compare observations. By the end of the lesson, students have a solid grasp of how to differentiate between these two properties, and they’re able to explain their findings with confidence.

Why Calcite Works So Well

Calcite is an excellent mineral for this activity because of its predictable cleavage. It’s a soft mineral, making it easy to break with minimal effort, and its cleavage planes are clearly visible even to young learners. Additionally, having a tangible takeaway piece makes the experience more personal and engaging for the students.

Using Boom Cards for Review

To further reinforce the concepts, consider using my Boom Cards to help students review the properties of minerals. These interactive, self-checking digital task cards are great for preteaching content, ensuring absent students stay on track, or providing extra practice for those who need it. They make learning engaging and accessible, whether in the classroom or at home.

Wrapping Up

This activity is always a highlight of our science lessons, and it’s one that students remember long after the unit ends.

For those looking to use the lesson, I’ve created sorting mats for the properties of minerals to help students categorize and analyze mineral samples even further. These mats can be a great addition to your classroom and are available for download below. By engaging in hands-on learning, they’re able to connect theoretical concepts to real-world examples, making the properties of minerals more than just a list of definitions. If you’re teaching this topic, I highly recommend trying this activity with your class—it’s fun, educational, and guaranteed to leave a lasting impression!


Sunday, May 19, 2024

End of Year Independent Investigation - Magnets

 As the school year winds down, keeping students engaged and motivated can be a challenge. A creative and hands-on way to capture their interest is by having them design their own science lab using magnets and the scientific method. This approach not only reinforces key scientific principles but also allows students to take ownership of their learning experience. Here’s how you can guide your students through this exciting project.

Step 1: Introduce the Scientific Method Template

Start by reviewing the steps of the scientific method, emphasizing the importance of each stage. Provide a template to guide students through their investigation:

  1. Ask a Question: What do they want to know about magnets?
  2. Do Background Research: What do they already know, and what can they find out about how magnets work?
  3. Construct a Hypothesis: What do they think will happen during their experiment?
  4. Test with an Experiment: Design and carry out an experiment to test their hypothesis.
  5. Analyze Data and Draw Conclusions: What happened during their experiment? Did it support their hypothesis?
  6. Communicate Results: How can they share their findings with the class?

Step 2: Provide the Tools

Give each group a set of magnets and additional materials such as paper clips, iron filings, and different types of metals. Encourage them to think creatively about how they can use these tools to explore magnetic properties.

Step 3: Brainstorm and Plan

Allow students to brainstorm questions they have about magnets. Examples might include:

  • How do different materials affect a magnet’s strength?
  • How does the size of a magnet affect its ability to attract objects?
  • How does distance affect a magnet’s pull?
  • What is the effect of different materials on the pull of a magnet?

Once they have a question, students should conduct some preliminary research to build a foundational understanding of magnetism. This can involve classroom resources, books, or online research.

Step 4: Formulate Hypotheses

Guide students to make educated guesses based on their research. For example, they might hypothesize that "A magnet will pick up more paper clips than a piece of iron of the same size."

Step 5: Design and Conduct Experiments

Students should outline a step-by-step procedure for their experiment, including how they will measure and record their results. This stage encourages critical thinking and problem-solving as they navigate the practicalities of testing their hypotheses.

Step 6: Analyze and Conclude

After conducting their experiments, students should analyze their data to see if it supports their hypotheses. This involves looking for patterns or differences and thinking about what these results mean.

Step 7: Share Findings

Finally, have students present their experiments and findings to the class. This can be done through a brief presentation, a poster, or a written report. This step not only reinforces their understanding but also hones their communication skills.

Benefits of the Approach

  • Active Learning: Students actively engage in the scientific process, enhancing their understanding and retention.
  • Critical Thinking: Designing and conducting their own experiments fosters critical thinking and problem-solving skills.
  • Collaboration: Working in groups encourages teamwork and communication.
  • Creativity: Students get to explore their own interests within the topic of magnets, leading to more personalized and meaningful learning experiences.

Using a scientific method template to have students design their own magnet labs is a fantastic way to end the school year on a high note. It keeps students engaged, reinforces key scientific concepts, and allows them to experience the thrill of discovery firsthand.