Showing posts with label Holidays. Show all posts

Sunday, February 9, 2025

Weathering with Conversation Hearts: A Sweet Science Experiment


Understanding weathering—the process that breaks down rocks into smaller pieces over time—is a fundamental concept in earth science. With this simple and engaging experiment, students can observe mechanical weathering in action using Conversation Hearts candy. This hands-on activity is perfect for demonstrating how rocks break down due to physical forces like wind, water, and abrasion.

Materials Needed:

  • Conversation Hearts candy (or any small, solid candy)

  • Small container with a lid (such as a plastic food storage container)

  • Small pebbles or aquarium gravel

  • Paper and pencil for observations

Procedure:

  1. Initial Observations: Give each student a few Conversation Hearts. Have them examine the hearts carefully, noting their shape, color, and any imprinted messages. Students can record their observations in a science journal.

  2. Simulating Weathering: Place the Conversation Hearts in the container along with a handful of small pebbles or aquarium gravel. Secure the lid tightly. Instruct students to shake the container vigorously for about 30 seconds to 1 minute. The pebbles act like natural forces such as wind and water that cause rocks to collide and wear down over time.

  3. Observing Changes: After shaking, pour out the Conversation Hearts onto a tray or paper towel. Have students observe and record how the candy has changed. They should notice that the edges may have softened, colors may have faded, and small fragments may have broken off.

  4. Discussion and Connection to Weathering: Discuss with students how this experiment models mechanical weathering. Explain that, just like the candy pieces breaking down due to friction and impact, rocks in nature are weathered by physical forces like flowing water, wind, and ice.

Extension Ideas:

  • Time Variation: Have students shake the container for different lengths of time and compare results.

  • Different Materials: Try using different types of candy to see if some weather faster than others.

  • Real-World Connections: Show images of weathered rock formations, such as smooth river stones or eroded cliffs, to help students connect their observations to real geological processes.

This simple yet effective experiment brings an abstract concept to life in a way that’s engaging and memorable for students. Plus, it’s a great excuse to use some extra candy after Valentine’s Day!

Need a review activity? Check out my Science Boom Cards - a no prep, self-checking digital activity for students to use either in the classroom (fast finishers) or at home for extra study time.


Monday, December 2, 2024

🎄Festive Fraction Fun {Free Math Craftivity}🎄


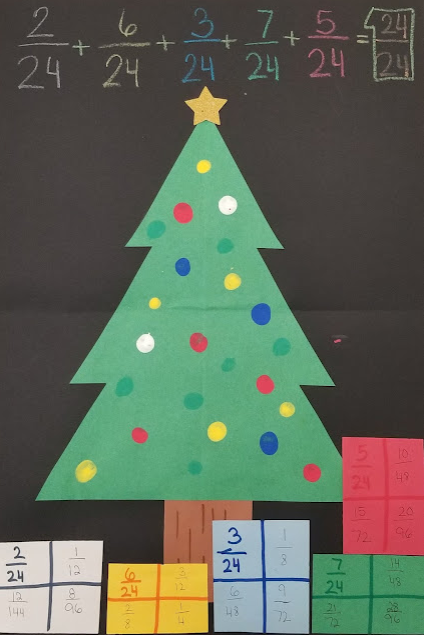
Each year, my 4th grade class embarks on a math adventure to turn a plain Christmas tree into a colorful tapestry of fractions.

The initial step involves finger-painting 24 ornaments onto the Christmas tree. Students love this part! (Just give into the messy fingers. If you put them all at one table by the sink, you'll survive.) Little do they know, the real mathematical exploration was just beginning.

Fraction Analysis: Once the ornaments are dry, the focus shifts to the world of fractions. Students will count ornaments of different colors, reaching the total of 24. The challenge is then to determine the fraction represented by each color. Each present below the tree should have the fraction of ornaments that are that color.

Equivalent Fractions Exploration: With basic fractions established, students now take a deeper dive into equivalent fractions. On each present, 3 equivalent fractions should be generated.

Equation Creation: The culminating activity involved the creation of equations demonstrating how they decomposed the whole tree. I like to use Crayola's Construction Paper Crayons to write the fractions so the colors really pop!

Finally, hang the masterpieces in the hall. Your principal will love the amount of math on them and the kids (and adults!) will love the festive feel they bring to your classroom.

store post


I hope that activity helps create some excitement in your classroom. I find it easiest to use one table for the "finger painting" station. While students are working on that, the rest of the class is completing centers within their small group.

store post

Saturday, November 9, 2024

🦃 Thanksgiving-Themed Review of Equivalent Fractions 🦃


 As Thanksgiving approaches, it's a perfect time to add some festive fun into your math lessons! This turkey-themed activity is a great way to review equivalent fractions while engaging students in creative, hands-on learning. We’ll combine a sorting and matching game with a craftivity and worksheets that cover multiple levels of understanding, including fractions, decimals, and percents. With differentiated options, this review suits a range of learners, ensuring every student is challenged at their own level. Let's dive into the details!

Turkey-Themed Center Activity: Equivalent Fractions Sorting Game

Objective: Help students understand and practice finding equivalent fractions using a fun, turkey-themed sorting game.

Materials Needed:

  • Turkey-themed fraction cards
  • Two different sets of fraction pairs for sorting (one easier and one more challenging)
  • Game board or sorting mats (featuring turkey feathers or plates)

How to Play:

  1. Divide your students into small groups.
  2. Hand out fraction cards to each group—some with simple fractions (like 1/2, 1/4, 1/8) and others with more complex fractions (like 3/6, 5/10, 9/12).
  3. The students will work together to match equivalent fractions from the easier set first.
  4. After mastering the first level, they can move on to the second set of cards for a greater challenge.
  5. Add a competitive edge by setting a timer and seeing which group can accurately match all their fraction pairs first!

This activity can be used as a center or even as a small-group instructional tool. It helps students visually connect equivalent fractions and deepens their conceptual understanding through peer discussion.

Thanksgiving Fraction Craftivity: Turkey Feather Fractions

In this craftivity, students will create their own turkey using fractions as the centerpiece! This creative task reinforces the concept of equivalent fractions while allowing students to express their artistic side.

Materials Needed:

  • Turkey templates (with a large circle for the body)
  • Construction paper feathers
  • Markers, scissors, glue

How to Create:

  1. Each student starts with a turkey body. They'll write a fraction on the turkey (e.g., 1/2, 3/4, or 5/6).
  2. On the feathers, they will label equivalent fractions. For instance, if the body says "1/2," they might label the feathers with 2/4, 3/6, 4/8, etc.
  3. After all feathers are labeled, students can decorate their turkeys and proudly display them around the classroom.
  4. As a class discussion, students can present their turkeys and explain how they identified their equivalent fractions.

This activity works as a great anchor for your classroom fraction wall or Thanksgiving-themed bulletin board!

Three Worksheets for Independent Practice

To solidify students' learning, you can use these three worksheets as follow-up activities. Each worksheet increases in difficulty to ensure all students are engaged at the right level:

  1. Equivalent Fractions Worksheet (Students Generate Fractions)
    Students will be given a fraction and asked to generate as many equivalent fractions as they can. This allows them to practice multiplying the numerator and denominator by the same number, which reinforces the concept that equivalent fractions represent the same value.

  2. Equivalent Fractions Worksheet (Fill in the Missing Numerator or Denominator)
    This worksheet presents incomplete fraction pairs where either the numerator or denominator is missing. Students must figure out what number is needed to make the fractions equivalent. This task focuses on understanding the relationship between the parts of a fraction.

  3. Equivalent Fractions, Decimals, and Percents Worksheet
    In this final worksheet, students will convert between fractions, decimals, and percents. For example, they may need to convert 1/2 to 0.5 and then to 50%. This will push their understanding beyond fractions and show them how these concepts connect to real-world applications.

Incorporating Differentiation

For students who need a challenge, you can increase the complexity of the fractions used in the sorting game or assign the more difficult worksheet options. For struggling learners, keep the fractions simple and provide extra support through manipulatives or visual aids during the center activity.


This Thanksgiving-themed review of equivalent fractions offers both rigorous content and festive fun. Students will enjoy the turkey-themed games and craft while deepening their understanding of a foundational math concept. By incorporating differentiated activities and creative projects, you can make math review a highlight of the holiday season!

How do you plan to incorporate Thanksgiving fun into your math lessons this year? Let me know in the comments below!

Thursday, October 17, 2024

👻 Haunted House of Multiplication Methods {Free Math Craftivity} 👻

Teaching multiplication can be a challenging task, but it becomes more exciting when we incorporate hands-on activities that help students visualize and apply their knowledge in different ways. One effective and creative way to solidify understanding is by practicing various forms of multiplication and then creating a craft that brings these methods to life. In this activity, students will practice the distributive property, arrays/box method, partial products, and the standard algorithm, all while crafting a haunted house. This is not only a fun and memorable learning experience but also makes for an eye-catching display for Parent Night.

Materials Needed:

  • Construction paper (various colors)
  • Scissors
  • Glue
  • Markers or colored pencils
  • Rulers (optional for neat lines)

Step 1: Review Multiplication Strategies

Before diving into the craft, ensure your students have a solid grasp of the different multiplication methods. Here’s a quick recap of the strategies:

  1. Distributive Property: Break down one of the factors to make the multiplication easier. For example, 12 × 3 can be split into (10 × 3) + (2 × 3)

    12 x 3
    (10 × 3) + (2 × 3)
    30 + 6
    36

  2. Arrays/Box Method: Use a visual representation where numbers are broken into their place values, and the partial products are calculated inside a grid or box. For example, multiplying 23 × 7 can be represented as a 2x2 grid for 20 and 3.


  3. Partial Products: Break the multiplication into parts by multiplying each digit of the numbers, then adding the partial results. For instance, with 34 × 6, multiply 30 × 6 and 4 × 6, then add the products.


  4. Standard Algorithm: The traditional method where you multiply the digits starting from the ones place, carrying over as necessary, and then adding the products.

Step 2: Introduce the Haunted House Craft

Explain to students that they will be creating a haunted house where the same multiplication problem is solved in four different ways. The multiplication problem itself will be written on the roof, and each window will display one of the methods of solving it.


Step 3: Building the Haunted House

  • Cut Out the Shapes: Students will start by cutting out a large square (or rectangle) for the base of the haunted house. Then, they will cut a trapezoid for the roof, which will hold the multiplication problem.

  • Add Windows: Students should cut out four smaller squares or rectangles for the windows of the house. Each window will be used to display one of the four methods of solving the multiplication problem. Students could also make the windows "open" by creating a folded window.

Step 4: Solving the Multiplication Problem in Different Ways

Each student will choose a multiplication problem to solve. For example, let’s use 12 × 5. Students will solve this problem in the following ways, writing each solution on a different window:

  1. Window 1: Distributive Property (e.g., 10 × 5 + 2 × 5).
  2. Window 2: Box Method (drawing the box and splitting numbers by place value).
  3. Window 3: Partial Products (breaking down the multiplication step by step).
  4. Window 4: Standard Algorithm (solving it the traditional way).

Encourage students to decorate the windows to match the "haunted house" theme—perhaps using spooky borders or eerie designs.

Step 5: Assemble and Decorate

  • Glue the Pieces: Once students have completed the windows with their different methods, they will glue the trapezoid (roof) on top of the square base and attach the windows underneath the roof.

  • Personalize: Students can decorate the house to look haunted, using construction paper or markers to add features like spooky trees, ghosts, or bats.

Step 6: Parent Night Display

Once all the haunted houses are completed, display them around the classroom or on bulletin boards for Parent Night. Each house will showcase how students can approach the same problem in multiple ways, illustrating their deep understanding of multiplication.

Why This Activity Works:

  • Differentiation: This activity caters to different learning styles, as students practice multiple ways of solving multiplication problems.

  • Creativity: It taps into students’ creative side, making math more engaging and memorable.

  • Visual Learning: The haunted house craft provides a visual representation of abstract math concepts, which can be especially helpful for students who benefit from seeing math in different forms.

  • Parent Engagement: The final product is a fun, thematic display that parents will love to see during Parent Night, giving them a glimpse into what their child has been learning.

Final Thoughts:

Multiplication doesn't have to be monotonous. With this Haunted House Multiplication Craft, your students can practice key math skills in a fun, hands-on way while showing off their work in an impressive display. This activity not only reinforces important multiplication strategies but also encourages creativity, making it the perfect blend of education and fun! 


Tuesday, September 17, 2024

🍂 Falling Factors (Math Craftivity) 🍂


If you’re looking to make learning about factors exciting and visually engaging for your students, look no further! The Factor Tree Craft is a hands-on activity that not only teaches students how to find factors of large numbers but also allows them to showcase their creativity. This craft is perfect for classroom displays and will make a fantastic centerpiece for parent night.

Why the Factor Tree Craft?

Understanding factors can sometimes be challenging for students. By integrating this concept into a creative craft project, you’ll help students grasp the idea more effectively and have fun in the process. Plus, their finished projects will make a colorful and engaging display for parents and visitors.

Materials Needed

To get started, gather the following materials:

  • Construction paper (a background piece and fall colors for the leaves)
  • Markers or colored pencils
  • Scissors
  • Glue

Step-by-Step Guide

1. Introduce Factors

Begin your lesson by reviewing the concept of factors with your students. Remind student that factors are numbers that multiply together to produce another number. For example, for the number 63, factors include:

  • 1 × 63
  • 3 × 21
  • 7 × 9

Make a list of these factors on the board, showing how they come in pairs.

2. Create the Factor Tree

Hand out a piece of brown construction paper to each student. Instruct them to draw or cut out a tree trunk and branches. On the tree, they should write the large number they are working with—63 in this case.

3. Prepare the Factor Leaves

Next, provide construction paper for students to cut out leaf shapes. On each leaf, they will write one of the factors of the number. Each factor pair should be the same color. For example, one leaf might have "1," another "63," and so forth. Ensure that all factors of the number are included.

4. Assemble the Tree

Students should glue or tape the leaves on the paper as if they are falling from their tree. 

5. Add Decorations

Allow students to decorate their crafts. This not only makes the projects more visually appealing but also adds a personal touch to each tree or scene.

Advanced Variations

For more advanced learners, consider these variations:

  • Use larger or more complex numbers for factoring.
  • Create a “Factor Forest” where each tree represents a different number, adding a layer of complexity to the project.

Perfect for Parent Night

Once the Factor Trees are completed, display them around the classroom or create a bulletin board exhibit titled “Our Factor Forest.” This display will be a delightful and educational highlight for parent night, showcasing both your students' understanding and their artistic talents.

Why This Craft Works

The Factor Tree Craft effectively combines math and creativity, making abstract concepts more concrete. It caters to different learning styles—visual and kinesthetic learners will particularly benefit. By seeing their factors represented visually, students can better understand the relationships between numbers.

Conclusion

The Factor Tree Craft is a fun and educational way to teach your students about factors. It encourages creativity while reinforcing important math concepts. Plus, it makes for a beautiful and engaging display that parents will love. Give this craft a try in your classroom, and watch your students’ math skills flourish!

Need More Factor Activities?


Tuesday, December 5, 2023

Festive Fraction Fun


Greetings, fellow educators and enthusiasts! Today, we delve into a free classroom activity where artistic expression meets mathematical concepts. Each year, my 4th grade class embarks on a unique math adventure, turning a plain Christmas tree into a colorful tapestry of fractions.


Crafting with Fingers: The initial step involves the exciting process of finger-painting 24 ornaments onto the Christmas tree. Students love this part! (Just give into the messy finger. If you put them all at one table by the sink, you'll survive.) Little do they know, the real mathematical exploration was just beginning.

Fraction Analysis: Once the ornaments are dry, the focus shifts to the world of fractions. Students will count ornaments of different colors, reaching the total of 24. The challenge is then to determine the fraction represented by each color. Each present below the tree should have the fraction of ornaments that are that color.

Equivalent Fractions Exploration: With basic fractions established, students now take a deeper dive into equivalent fractions. On each present, 3 equivalent fractions should be generated.

Equation Creation: The culminating activity involved the creation of equations demonstrating how they decomposed the whole tree. I like to use Crayola's Construction Paper Crayons to write the fractions so the colors really pop!

Finally, hang the masterpieces in the hall. Your principal will love the amount of math on them and the kids (and adults!) will love the festive feel they bring to your classroom.

Grab the instructions here:


Saturday, July 23, 2022

#ChristmasInJuly22 Sat

 Our final day of the #ChristmasInJuly22 sale is here! I hope you were able to score some great deals from the authors that put together the sale. 

Today, you're in for a treat. It's FREEBIE day! Act fast to grab this $4 Freebie to get ready for Thanksgiving. If you love it, please leave feedback on TPT's site. If you have suggestions for improvement, please send me a message through Facebook.


Sunday, December 1, 2019

"Easy" Classroom Christmas Party

It's that time of the year!!!! Christmas!!! Easily, my all-time favorite holiday and I love sharing fun things to do with the classes. But, with all the stress of it being report card time and trying to make magic happen for my own family, the classroom is one more stress factor that many women don't need. Over the years, my team has perfected the "Easy Classroom Christmas Party."

Morning: Begin the morning with opening Christmas presents. (See below for how I do this cheap!) Then, allow the kids to bring games & play in the classroom.


Middle of the Day: Gingerbread Houses. This is the hardest part, but can be managed on your own if you lack parent volunteers. I set up during our planning time, have the kids come back and give instructions before they're allowed near the tables. On each table I have: a plastic tablecloth to make clean up easy; bowls of candy all mixed together; 1 plate per child holding the following: 2 milk cartons taped together, 4 unbroken Graham cracker sheets, 2 half Graham Cracker sheets; 1 spoon per child. As they come in, I give them the frosting container they brought in and tell to pick a spot. They use the frosting to "glue" the Graham crackers to the milk cartons to make the house. Then, they use the frosting to glue candy decorations to the house. When done, they're given a piece of tape with their name on it to stick to the bottom of the plate. Carefully, place the whole plate & house in cookie platter bags and tie them up  nice and pretty to go home. Once done, clean up and start the movie.

Lunch Until End of the Day: In the classroom with a movie. Polar Express is always a favorite movie, but my kids have seen it a million times (every year in elementary school), so they get bored quickly. For that reason, I'll show A Christmas Carol. It's rated PG, which means I have to get parent permission, but it's really good and one the kids haven't really seen. If we still have time, I break out the old Christmas TV specials: Rudolph, Frosty, Santa Claus is Coming to Town, etc. This is when I get out the hot chocolate that was in their Christmas stockings.


Christmas Presents

I order stockings through Dollar Tree ($1 per stocking, but I've also used lunch bag sized goody bags from Wal-Mart) and fill it with books from Scholastic and Dollar Tree items: pencils, erasers, stickers, stamps, coloring books if I can find them less than $1 each. I also include a baggie of "Snowman Soup" - hot chocolate, marshmallows, and a candy cane. I pick up a bag of Styrofoam cups and they use hot water from our classroom sink to make their hot chocolate. The candy cane is used to stir it. And finally, throw a homework pass and/or extra credit pass in there. Free for you and worth its weight in gold to them!

Gingerbread Houses Materials List

  • Plastic Table Clothes - 1 per table students will be working at.
  • Cookie Platter Bags - Can be bought at Dollar Tree - 1 per child
  • Plates - 1 per child
  • Spoons - 1 per child
  • Bowls - 1-4 per table, depending on the size of the bowl
      Have Students Bring In
  • Everyone brings in 1 can of frosting (cream cheese is thickest and works best. Whipped frosting is too thin and everything slides apart) If in a pinch, I've had kids share frosting by putting a glob on a plate or bowl.
  • Students with Last Names Beginning A-F: Plain Graham Crackers (or about one-fourth of your class)
  • Everyone Else: Bags candy or another item (pretzels, etc) to decorate the houses


Monday, October 21, 2019

"Not-a-Halloween" Halloween Party

Over the years, I've had students that can't participate in Halloween parities. And yet, at my school, we have a costume parade every year (technically, a storybook parade, but it's held on Halloween...every year...and the kids wear their Halloween costumes). So, the rest of the parents sort of expect some sort of Halloween party. I've managed to come up with a solution for all of my students.

Pumpkin Math

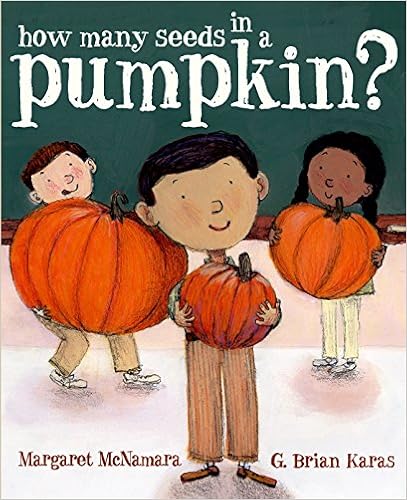
We first read How many Seeds in a Pumpkin? Be warned, pre-read the book. The end of the book gives away a little too much information to make determining your own seeds an actual guess.

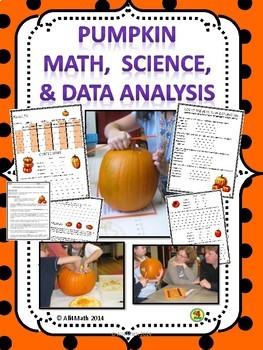
Pumpkin Math, Science, and Data Analysis - 3rd, 4th, 5th, 6th GradeThen, we break open the math with this activity I found on Teachers Pay Teachers. I wish I had thought of it, but all credit has to go to All4Math. My students thoroughly enjoyed working through the packet this year. We took her ideas and created a large chart of our data.

This will easily take up most of your day - if not all of it. I had to start it a day early last year so we could finish and even then it was tight. The kids love it because it involves pumpkins, but since you're not actually carving jack-o-lanterns, most families will be fine with the seasonal activity.


Movie Time

After lunch, as the students are starting to get trick-or-treating on their brains, I break out whatever treats we have (I usually make cupcakes and put 3 Bertie Botts Every Flavor Beans on top - those are fun to watch!) and The Wizard of Oz. Strange as it seems, many students have never seen this movie. I guess it's because it's considered old compared to all the newer movies out there.

Saturday, December 8, 2018

Christmas Gifts for Co-Workers

I always want to give my co-workers a little something at this time of year, but both time and money are tight - as is true for a lot of teachers. I've come up with a few solutions over the years that my teammates love and even look forward to.

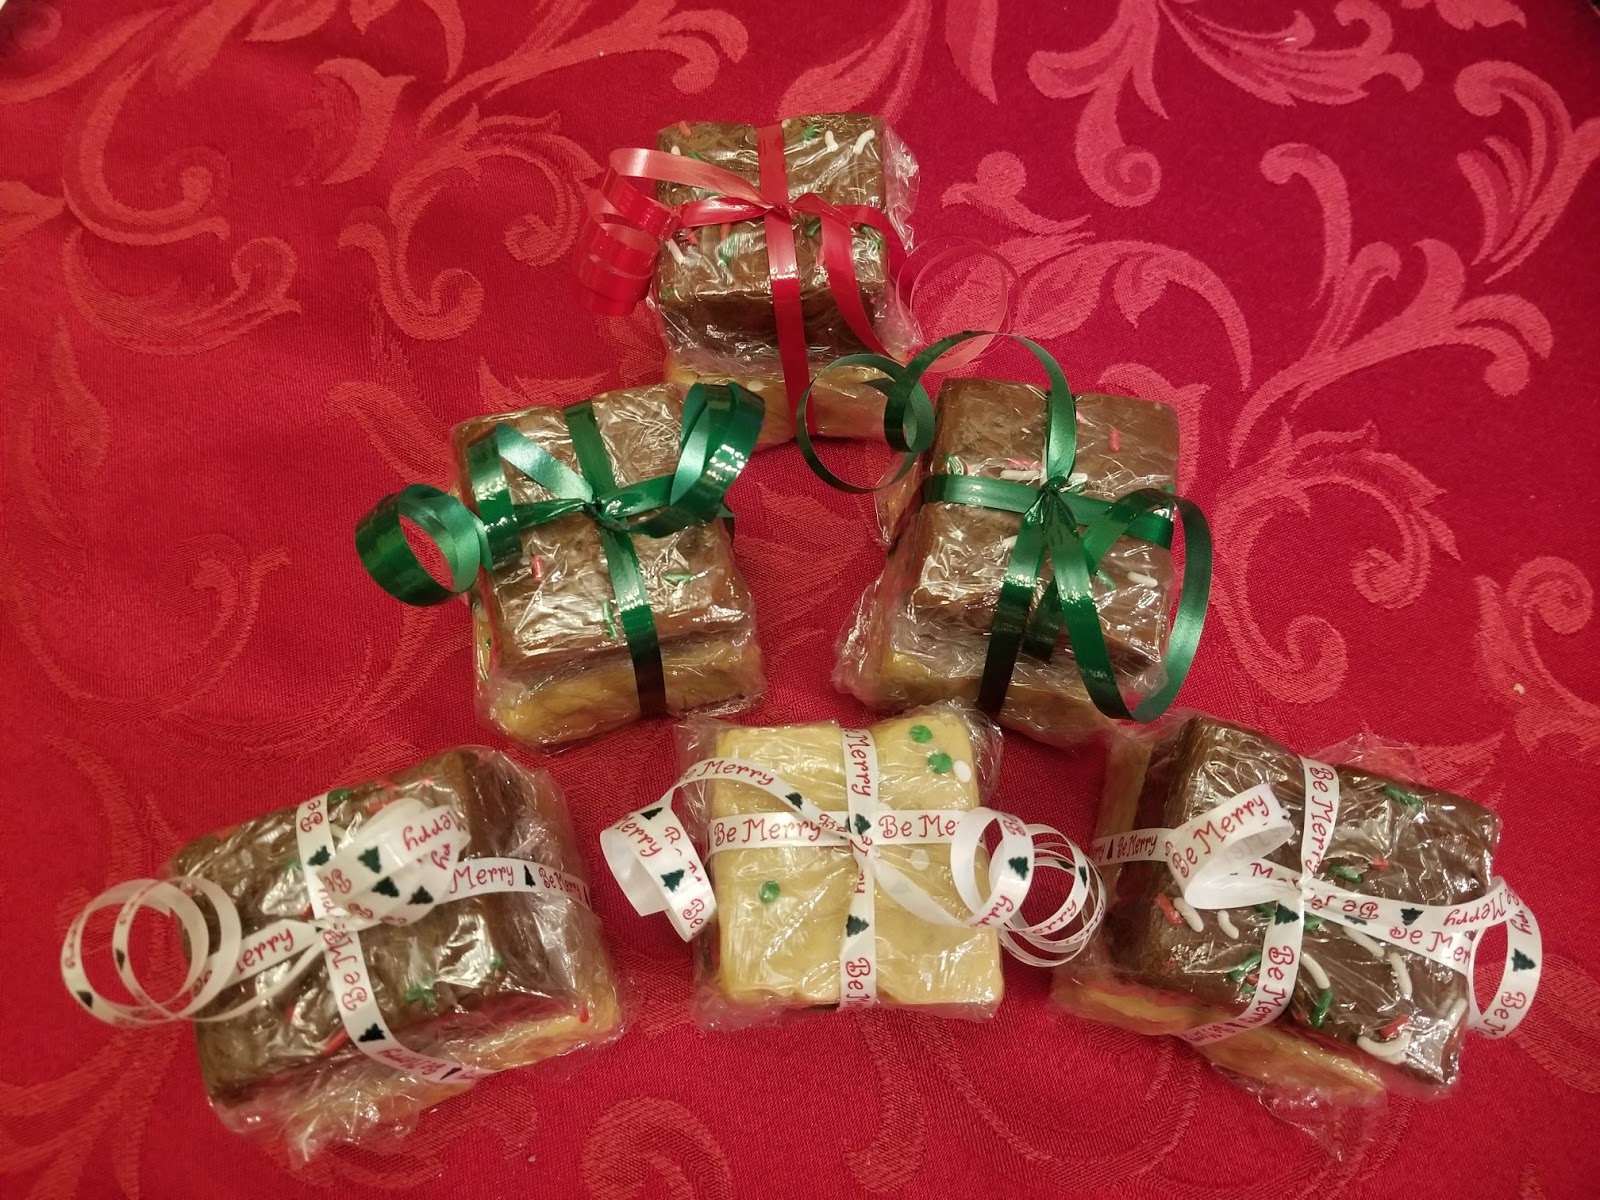
Fudge - hands down, a favorite of theirs (and it's gluten free). I've heard that fudge can be difficult, but Kraft's Fantasy Fudge recipe has yet to fail me. My little secret? Double the recipe & pour it into a 9x13 foil-lined pan. The fudge turns out roughly an inch thick. I cut it into 24 squares and give each person two huge pieces of fudge that look like they came straight from an over-priced candy shop on Main Street USA. ºoº

Kraft's Recipe (Already Doubled For Your Convienence)
6 cups white sugar
1 1/2 cups butter (3 sticks - softened or not...doesn't really matter)
1 1/3 cups evaporated milk (I just use 2 small cans. Do NOT use sweetened condensed milk.)
24 oz of "fun stuff"* - more on this later
2 (7 oz) jars of marshmallow cream
1 cup chopped walnuts (I always omit these since some people - ME! - don't like nuts in their fudge.)
2 tsp vanilla extract**
festive sprinkles

Line a 9x13 pan with foil making sure to really press it into the corners. This will ensure that the corner pieces look decent and can be used for gifting. (Or you can plan on cutting a bit off all the way around and "testing" your fudge to make sure it's good to gift!)

Mix sugar, butter, and evaporated milk in a large, heavy saucepan over medium heat, stirring constantly. Bring to a full boil. Boil for 3 more minutes while stirring constantly. This is crucial. You must boil the full amount of time. As I start to think mine is boiling, I glance at the clock. Usually, it takes another 45 seconds or so to really get boiling. So, I probably boil mine for 3-4 minutes. Allrecipes.com says 5 minutes....haven't tried that, but as long as you're stirring constantly it should be fine.

Remove pan from heat & stir in the "fun stuff"* and marshmallow cream until everything is melted and smooth. (If using a chip, stir a little extra to really make sure they've all melted. One year I didn't...I had tiny bits of chocolate chips in my fudge. Co-workers actually loved that batch...) Add the vanilla extract last.

Pour into the foiled pan and immediately add some sprinkles to make it look festive. Let it cool completely. Then, lift the whole pieces of foil out of the pan, set it on a large, flat surface, and cut it into 24 huge squares with a pizza slicer. Wrap in plastic wrap and tie 2 together with a nice bit of ribbon.

*The "Fun Stuff"....Kraft says to use chocolate chips. Two 12 oz bags will do it. I say...mix it up! One of my best recipes uses peanut butter. I replace the chocolate chips with about 3 cups of peanut butter. The only thing to be careful of here is that chocolate chips are hard and peanut butter is very gooey - which is why I don't put in 4 cups. This fudge will turn out softer than regular fudge, but it's my favorite!

*Fun Stuff to Try: any type of chip (chocolate, butterscotch, white chocolate, etc.); 3 cups of peanut butter; white chocolate chips with a couple of tablespoons of ginger (gingerbread fudge); white chocolate chips with peppermint extract (replaces the vanilla) & crushed candy canes. I also like to do a regular batch of peanut butter fudge and then add a thin layer of chocolate fudge on top. The possibilities are endless!

**Vanilla extract can be replaced with any type of extract. I like to mix it up with peppermint and make candy-cane fudge for at least one batch each Christmas. Hmmm....I wonder how orange or raspberry extract would go with chocolate....


Sugar Scrub - I needed this for a diabetic co-workers. My fudge was definitely out. But, we both got to enjoy this scrub since it made so much!

Mix together: a good coconut oil & white sugar. I started with about 1 cup of sugar and then added tablespoons of coconut oil until I got the texture I wanted. Add a couple drops of essential oil. I used lavender...what teacher doesn't need to relax right around Christmas with our high-stakes tests right around the corner??

Dollar Tree had small jars I put the scrub in and then dropped it into a nice little gift bag. Done!! And, these could be done over Thanksgiving break giving you a head start on your gifts.


Dry Rubs - My hubby LOVES his grill and cooking out for us - we live in FL where we can use the grill almost year-round - and some of these dry rubs are our favorites. They would make a nice gift for the man on your team that isn't into sweets or girlie-bath stuff. Scroll down her page just a few inches to find a visual recipe graphic you can save to your hard drive.  10 Dry Rub Recipes to Up Your Barbecue Game


Saturday, November 24, 2018

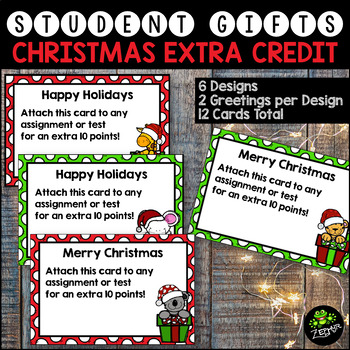
Inexpensive Christmas Gift for Students - Extra Credit!

Christmas Extra Credit CardsAt my school, our fourth grade is departmentalized...which means I have 100+ students. I love being able to focus on just a couple of subjects, but when it comes to Christmastime - my favorite time of the year - my heart wants to give each student a little something,....but my bank account (and husband) balk at the idea of how much I would have to spend. So, I had to come up with an alternative.

All students love extra credit. So, I created these little guys to print out for my students. It's easy, inexpensive, and they love it. I like to print on card stock (in color) and then slip them into cards from the Dollar Tree. (In 2017 Dollar Tree had 12 packs of cards.) A candy cane or Christmas pencil would be a nice touch taped to the card or even the back of the extra credit card if you decide to skip the Christmas card.

And viola! There you have a gift for all the little ones that come into your classroom...and you don't have to hide the bank statement from your hubby!


Tuesday, November 13, 2018

Thanksgiving Stuff(ing)

Thanksgiving is right around the corner! My classroom is decorated with fall garland and harvest window clings. I don't go too crazy since we only get a few measly weeks in between Halloween (which I really get into since it can last the entire month of October) and Christmas (we won't even talk about how decorated my class gets for Christmas!), but I do like to throw out some fall decor and projects. Go now and grab a couple of strands of garland & some window clings from Dollar Tree. Your front board will thank you for it. :)

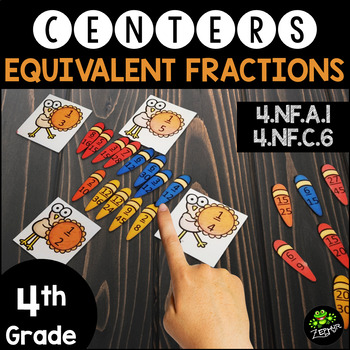
Turkey Fractions {A Thanksgiving Unit about Fractions, Decimals, & Percents}As far as day-to-day classroom activities, my Thanksgiving centers are out and ready to go. By far, my favorite is this equivalent fractions center my kids are working on this week. But, it does require some prep work.

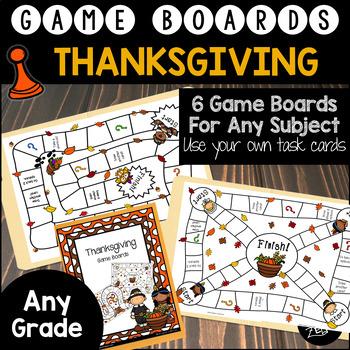
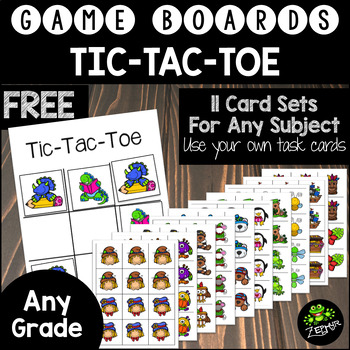
If you're just trying to survive and cant think about prepping a new center, I've also got my Thanksgiving game boards - just add your own task cards. I use both the game boards & the (freebie) tic-tac-toe games with task cards so I can have my students practicing whatever skill they need while they get a seasonal theme added to their centers.

Thanksgiving {Game Boards}   Tic-Tac-Toe {FREEBIE}

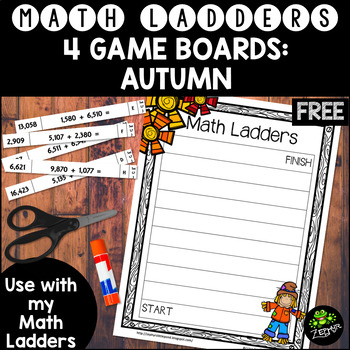
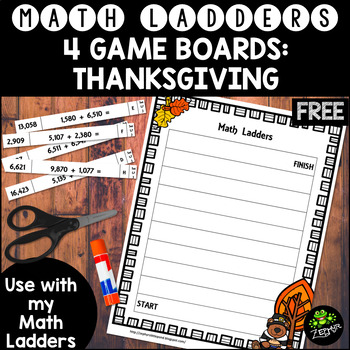
And, if you have any of my Math Ladders, you really should grab the Fall & Thanksgiving Math Ladder boards. After all, they're FREE! You can't beat that price. :)

Game Board: Autumn {Math Ladders}    Game Board: Thanksgiving {Math Ladders}

Image result for charlie brown thanksgiving So, that takes care of my centers. But, what about the last day before Thanksgiving break. My 4th grade is departmentalized and so we don't really have a lot of time. But, I do try to sneak in the Charlie Brown Thanksgiving movie. I like to have pumpkin bread (either make it ahead of time or in the classroom - depending on time) and have the students make butter. It's not a huge party (we did just finish Halloween & Christmas is around the corner), but it's a nice break in the afternoon.

Oh, and that last hour of the day? I'm completely guilty of getting out the Christmas tree!!! The kids love helping me decorate (and, I'll be honest, I love that I don't have to do it myself). It makes the room cheerful to come back to after our break and is one more thing to enjoy/not stress about during the month of December.