Sunday, June 9, 2019

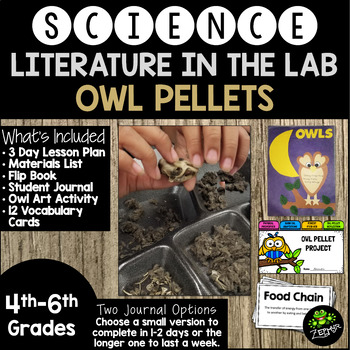
Owl Pellets

So, you want to jump into the world of owl pellets! This is not meant to be a comprehensive unit designed to get your class ready for a test.

This is a fun project for the end of the school year – after testing is over, but before you’re allowed to start showing movies and having all day recess. You know the days….the grade book is closed…you’re working on make up work…and administration still wants you to be doing something academic.

Student engagement usually dwindles down to an all-time low (especially if you’re busy chasing down missing assignments or having kids redo work), but dissecting owl pellets in my room almost always guarantees I have 100% participation. Even from the kids that never want to participate.

The most practical thing about this unit, from a teacher's point of view, is how little you HAVE to be involved. You'll need to give instructions, obviously, but since you've taught students how to find the physical properties of matter (mass, measurement, etc), you don't have to stand over them as they do this. When it comes to opening the pellet, I start out with a video so the students get background on exactly what a pellet is and how it's formed. (This is a good one from You Tube,  if you decide not to order the DVDs.)

You may consider writing a grant through Donors Choose, especially to get the DVD and posters. In the past, I’ve had students bring in a couple of dollars for their pellets, but I’ve found that writing a Donors Choose grant to pay for the grade level makes it easier to guarantee that everyone gets to participate.

Owl Pellets {Literature in the Lab}


Sunday, May 5, 2019

Teacher Appreciation SALE

It's that time of year again! TPT is putting their site on sale Tuesday and Wednesday of this week.


Friday, April 19, 2019

What's in your Science Center???

I was once told that anyone should be able to tell what I teach just by glancing around my room. That person was in charge of deciding what we were going to be teaching as we discussed departmentalization for the next year and I was terrified I'd land with reading all day. Luckily, she was using my room as an example...it was covered in solar system things at the time. :D But, it's something that I've held to...we really should have things out to get the kids' attention for our subject areas.

Last summer I really focused on what I wanted my room to look like. One area was my science center. I've always had one, but it didn't have a purpose until last year. The way the kids used it was completely different compared to previous years. Plus, I was able to keep things fresh with minimal work for me (during the year). 

Now, one thing to note, we have little down time in my class. I wasn't looking for a center that they'd actually rotate to or spend a lot of time in during class. I knew kids wouldn't have time to work on a project and finish it or come back to it the next day (3 rotations of science....I wasn't going to have half-finished projects for 66 kids laying around my room for a month). This set up is for grabbing a few minutes here and there - especially those few minutes before school and during bus duty after school.

I figured out some basics and then made everything fit for the nine weeks. I also only changed them out each quarter - yep, only 4 times a year.
  • Posters: I use the space above the center to display posters for the current quarter. I use a black background and rarely change it (we're talking about once every two years....due to fading). I do change out the border and posters. A secret I discovered....put your second quarter border up first and then use a larger border for first quarter over it. Staples go through and you can just pull the top layer off. I do the same for the posters if I can find some that are the same size. Now, you are damaging the border & posters with two sets of staples, but the time it saves me is worth it. 
  • Task Cards: I printed the Science Penguin's Task Cards sets, hole punched one corner, and put them on the bulletin board near the bottom within kids' reach. I store the unused sets in a container under the center. They're really easy to set up for the next nine weeks.
  • Books: I pick up a bunch of books from the library on the topics we'll be studying. I display them either by setting them up neatly or keeping them in a plastic bin on the center - depending on how much space I have.
  • Observation Items: I have at least one thing for students to observe. All items are kept on the same shelf (or shelves) in my office, so they're easy to get to and put away.
    • Physical Sciences: I put out a basket of random items (sea sponges, coral, shells, coquina, turtle's shell, alligator's claw, raccoon's tail) and things for them to observe/measure with (hand lens, pan balances, rulers, spring scales, etc).
    • Space: I have a model of the solar system that can be moved and a Moon in My Room for them to "play" with. And then there are the sets of model rockets I've picked up from Kennedy Space Center that they love to look at and read about. An inflatable astronaut, space shuttle, and Saturn V rocket round out the center.
    • Earth Science/Rocks & Minerals: I have rock & mineral sets. I also bring out my dinosaur stuff at this time because it doesn't fit anywhere else in our curriculum and this chapter falls right about crunch time for getting ready for state testing. The kids eat up those dinosaur books and the reading teacher loves that they're reading nonfiction. And, it's fun. :) For the observation...I have an inflatable globe that shows what dinosaurs were native to each area of the planet.
    • Life Science: Easily my favorite and the simplest. I have managed to acquire several aquariums through Donor's Choose grants. In them, I keep critters to depict complete & incomplete metamorphosis: tadpoles, monarchs, grass hoppers, and lady bugs are routinely found there.
  • Hands On: I try to have at least one hands on activity, but sometimes don't. The Life Cycles center is too crowded with just the aquariums. At the beginning of the year, I have a Robot Turtles Board Game & Snap Circuits. I paid $8 a piece at a 2nd hand kid's shop for them - both were brand new. Check out Goodwill or the second hand shops around your town for games like this. Legos are great for your center too!! You can buy bulk sets of wheels for legos off of ebay or get some small generic brand packs at Dollar Tree. Generic brand usually work just fine. I also like to throw a couple of cans of Play-Doh in there once I teach the kids how to use it - for models, not to make hamburgers (unless it's indoor recess time and I get to stay out of FL's August heat...then, make all the hamburgers you want).

Organizing It: I actually created a Google Task list and made a section for each quarter with the items I wanted in my center. On our teacher work days before the next quarter, I peek into the list and quickly change out the items. Other than running to the library, it takes less than 10 minutes to change out. And a lot of times, I'll just pick up the books the next time I take the kids to library.

Note: Please ignore the crazy monkeys and palm trees. Those are for my Survivor Test Prep Unit.

Monday, April 8, 2019

Survivor Themed Test Prep

If there's one thing I hate, it's test prep. But, if we have to do it, then I want to ENJOY it. And this method is pretty much stress free (after the first year) and my kids are begging for test prep days.

The premise of my classroom is simple: I've grouped my students using their last math data scores. Each group is given a tribe name and works together to earn points for their tribe through our Reward Challenges and Immunity Challenges. At the end of the class period, we hold a Tribal Council and one team is "voted off the island." (No one is actually kicked out of class - that would defeat the purpose of test prep!) The tribe with the most points at the end wins the prizes I've accumulated (stickers, fun erasers, coupons to restaurants, random toys, etc....all kept nice in a beach bucket from Dollar Tree).

Grouping Students: I'm extremely intentional about exactly who my students sit with. I rank my kids from highest to lowest (using more than one set of data). Then, since I have 5 table groups, I label the top five as High, the second five as High-Medium, then Low-Medium, then Low. If I have extras, I make my High-Medium group bigger. (These are the kids that need extra practice or they're going to fall in their test scores or the ones that are just "so close!")

Then I put together groups of High, High-Medium, Low-Medium, and Low so that the High and Low-Medium are sitting together and the High-Medium and Low are sitting together. I put the High student across from the High-Medium student so that the High-Medium can "overhear" how High explains things and use that to model how he/she explains things.

If I have to have 5 in a group, I put the extra High-Medium on the end by the High & High-Medium. This also keeps my lower students in the front for when I'm teaching.

High
High-Medium
Low-Medium
Low

So, what does a  day look like? I start each day with a Cram at Camp because it's group work and I can take care of whatever else needs my attention at the start of class. The kids are anxious to get into their Cram session because the more they study the better they do (and the reluctant learners are dragged in by the competitive ones!) We end with Tribal Council because...well....it's Tribal Council! Everything else can be mixed up in whatever way works. Sometimes, I don't do both Reward & Immunity Challenges in the same day (if we don't do Immunity Challenges, then no Tribal Council.)
  • Cram at Camp (10-15 minute sessions) - Students work within their groups to complete a packet of test questions. I simply print a booklet of questions out for each group and they work through them as a tribe. I stress to the kids that it's not about completing the entire book. It's about making sure that everyone in the group understands the problems they get through. I have the kids do a cram session as soon as they walk in (gets them settled in faster) and another one later in the day. They're doing 30 minutes of cramming, but breaking it up helps keep them focused. (I really like this Test Prep Series. Days 1-50/Days 51-100)
  • Zip Line Adventure (10 minutes) - A quick mini-lesson taught by the teacher. I do one a day and have all the skills mapped out before I start the unit based on what my kids need to review according to their data.
  • Reward Challenge - Game time! We play a game (see the games section below) as a class. 
    • I have one person from each group come to the front table where I have white boards ready. Each person on the tribe is assigned a number. All the 1s have the same ability, all the 2s are the same ability, etc so that my High students aren't competing against the Low students. If I have extras, my High-Mediums are in two groups. If I don't have enough for 5 in each tribe, the groups with 4 will have one student that comes up twice. I assign that spot to a student that really needs some extra practice.
    • I show the question on the doc cam, they solve it, first person to answer correctly gets the points. If they answer wrong, they have to go back to their seats. Some questions are multiple choice or multi-select (the format of our state test), so I do this to discourage randomly guessing. To  make the questions, I cut apart an old math book, pasted the word problems on index cards with the answers on the back.
    • At each table, the other kids have white boards and are solving the questions at the same time. If anyone is not working, I make a note and take points from the tribe. When they get done, they hold up their white boards and I give them quick feedback to let them know if they're right or wrong. If wrong, they try again.
    • Once we've got a winner, everyone is out, or they're just wasting too much time, we go over the question as a class.
    • At the end of the game, I record their points and put a count on the board of how many points each tribe has. (See the picture above.) The team with the most points gets 5 points on their totem pole. (I have 5 groups). The second place team gets 4, etc. If I have a tie, they tie for the highest point value.
    • Note: If someone is absent, their group has no one to compete for that round. This helps with attendance, but also keeps groups from always sending in the High kid as a substitute.
  • Tree Mail - I try to give the kids a quick idea of what the Immunity Challenge might focus on (NBT, NF, OA, MD, or G). This helps ensure that they're working through all different types of problems in their Cram at Camp sessions and not hanging out at the front of the booklet where the NBT questions are.
  • Jungle Trek - I've got to get some grades during test prep time, so I call our graded assignment time Jungle Trek. I'll give one assignment that should take no more than 10-15 minutes and when they're done they can go back to Cram at Camp.
  • Immunity Challenge - Game time again! The only difference is that at the end of this game the points are recorded on the board as [total points for the game] + [#of points for today's immunity challenge]. See the picture above. The group that wins immunity gets 5 points (circled in the above picture) and can't be voted for. I hang the funny tiki guy over their table (our Immunity Idol) and then we get ready for Tribal Council.
  • Tribal Council (10 minutes) - It's a wasted 10 minutes...I'll be honest. But, I'll gladly give up 10 minutes per day to keep everyone focused & engaged for the rest of the class period. I tear up a sheet of 12x18 construction paper into 5 slips and give each tribe a slip. As a tribe, they choose which tribe will lose all points from today's immunity challenge. Alliances form, alliances are broken. Drama ensues. It's great!!!! I tell the kids that what happens in the game, stays in the classroom. Breaking alliances is part of it. So, we show our votes, do a final tally for the day, and I send them to their next class.
Games - I try to keep the games something easy for me to set up. I only get (on paper) 10 minutes each day to prep for my classes, so I really don't want to spend hours prepping a game.
  • Jeopardy - I have a Jeopardy pocket chart that I slide cards into. Ahead of time, I had to assign point values and categories (NBT, NF, OA, MD, and G seemed like good categories) that I wrote on the back of the cards. Now, to set up Jeopardy, I grab the Ziplock labeled Jeopardy and pull out random cards. As we use the cards, I put them aside. For the next game, I add in cards only to the pockets needing to be replaced. (Or, if they solve all the questions for NBT 100 points, I leave that pocket empty.)
  • Turtle Egg Hunt - I bought these pool toys for my son when he was little and decided that opening a turtle egg to see how many points you earned was an easy game. You could always use Easter Eggs too.
  • Wibble Wobble Island (Pictured at Right) - I took an old Twister Mat and labeled each circle with a point value. For fun, I added some shark infested waters with negative points. :) They have to roll an Easter Egg (that has a marble inside of it) and get it to land on an island (any island - color doesn't matter). Those Easter Eggs go all over the place! If they roll off the map, negative or no points.
  • Build the Highest Tower - I found an old Bandu game at  Goodwill. (Any building blocks can work.) I put pieces under coconut halves (bought those at Dollar Tree) and the winner of each round chooses a coconut half and has to use the piece to make their tribe's tower. Tallest tower wins. Second tallest gets 4 pts, etc.
  • Beach Bucket Toss - I line up 3-5 beach buckets and assign points to them. (At least 1 has negative points.) Students choose an Easter Egg to represent the tribe they're earning (or losing) points for. For this one, they don't have to choose their own tribe color! So, it's possible for a team to be given negative points from another team.
  • Flying Monkey (Pictured Below) - I have a cute stuffed monkey and a mat labeled 1-10. You could just mark off the floor with painter's tape. They toss the monkey and however far he goes is how many points the tribe gets. I usually give negative points if he flies too far in order to discourage crazy throws!
  • Stinky Feet - I just found this game online last night and LOVE it. Prep time is minimal.

Setting Up the Island - My first year of doing this, I had a few inflatable palm trees that I paid top dollar for from our local party store. Then, at the end of our school year (May/June), I found that Dollar Tree had brought out all their summer party gear. I picked up tons of inflatable palm trees, monkeys, and parrots. I got the coconut shells (they're supposed to be for drinks) and tiki totem paper cut outs (that I hang over their desks). One thing I also picked up right away was the Survivor Soundtrack from Amazon. I love music and having the music in my room (even without tons of decor) brought the Survivor Island feel to the classroom.

Get the Files - My Google Drive - I've posted my version of the Survivor Logo, Tribe Signs, and Tiki Totem Poles for tracking points on my Google Drive. Feel free to download them and use them to survive your own test prep.


Monday, February 25, 2019

TPT Sale!

Get ready for another TPT sale! Save up to 25% on Tuesday & Wednesday of this week.


Sunday, January 20, 2019

Constellations & Earth's Movement


Space...the final frontier....and my original favorite topic to teach in Science! I say original because as I've learned more and more about the other things I teach, I enjoy those too. But, space will always hold a special place in my  heart. Star Trek: TOS is how my dad introduced me to that final frontier...and I'm the daughter he took to Kennedy Space Center because....well, because I actually stop to read each and every plaque - just like him. KSC is an amazing place to visit, if you ever get down here to FL.

Now, the one benchmark I found difficult to explain to my students at the beginning of my career was SC.4.E.5.1 - why constellations seem to move across the sky. I used the textbook for the first few years....just reading through it with the kids...but, of course they didn't really understand it and I had nothing in my "bag of tricks" to help explain it any better.

Then, I found this book. I love this book. It's got a ton of great resources in it (including a bunch of information about the Space Race that I used for an amazing Socratic Debate during my opinion writing unit). But, what really helped my science class was the constellations activity. Basically, you have 12 students hold the 12 constellations in a circle around a lamp. The rest of the class gets on the inside of the circle and pretend to be Earth. In this way, the students get the full understanding that the constellations on the other side of the Sun are still there, but since you have to face the Sun in order to face them, you can't see them because of the blinding light of our own star. Such a simple idea, but so powerful for my kids. I also incorporated the idea of making the kids figure out whether the Earth turns clockwise or counter-clockwise as they had to make the Sun rise in the east and set in the west. (Everything in this solar system - EXCEPT VENUS - rotates counter-clockwise. And Uranus....but that's a whole different story!) Now, if your kids are really good - or with some guidance - make them figure out how the Earth revolves around the Sun. (Counter-Clockwise) I have the month the constellations are most visible written on the back of them and someone inevitable finds theirs and realizes I've put them in order around the Sun...the constellations then start telling the Earths which direction they need to move to keep the calendar moving along in the right direction.

And then switch so all constellations get to be an Earth and vice versa.

This activity is great...but then I found something on CPALMS to add to our notebooks that solidified the lesson in the students' minds. (The whole lesson is great, but this one notebook activity is simply amazing - if you don't have time for anything else.)

The instructions say to draw 3 constellations (I chose 4 because it was easier to draw in the 4 corners of the page) on a sheet of black construction paper. We also drew a Sun in the center instead of cutting out Suns. Then, we drew an Earth on a small scrap of construction paper. We put a little man on the Earth so that we could spin him around and show day/night as well as his location in relation to the Sun. Everything was glued into our notebook and our little Earth Man lives in a pocket on the next page with the students' reflection.

A note about the crayons...I won those in a random Crayola contest several years back. The colors are not your normal Crayola colors (no true reds, blues, or greens!), but they are AMAZING when it comes to black paper. I save them for very specials occasions - mainly my unit on Space.


Saturday, December 29, 2018

Math Centers in My Room

I'm a firm believer in the power of independent math centers and a teacher-led small group - as long as the students are actually working, of course! There's the question of grading math centers (more accountability for students, but more work for teachers) or allowing them to grade (do they cheat??) or requiring nothing to be turned in at all (ikes!). I have tried to find a happy medium in my room that allows flexibility, accountability, and as little extra work for me as possible.


At the end of this post, you'll find a link to an Excel spreadsheet that I use for planning. I've set it up to be printed if you want to, but I never print it. It's a document I pull up on my computer & edit as I'm holding small group (taking attendance, making notes about skills needing to be revisited) and then I save it to our network for my administrators. On my regular plans, I note whether we held centers that day or if we did something different - whole class computer lab, graded assignment, extra lesson time, etc.

My Schedule

Everyone's math block looks a little different. Mine is 90 minutes (give or take). I have the students do their Daily Review and XtraMath (to practice fact fluency - it's free!) for about 15 minutes. We then review the Daily Math and move into our lesson (about 40 minutes). The rest of the class time is for centers or an assignment.

The reality of teaching is that we have to take grades. The last two weeks before Thanksgivings, I tried putting a graded assignment into my center rotation and it was a nightmare. I had no idea who had completed it (who needed extra time per their 504 or IEP), who was absent (since it was done over a 5 day period), and the kids that did it on the first day didn't get any sort of feedback for about a week. It didn't work.

And the stress on me to make sure we finished the lesson with enough time for students to complete their centers - one of which was a graded assignment??!?! Let's not even go there! After those two weeks, I gave up and didn't even try to attempt it between Thanksgiving & Christmas. (Getting really sick for over a week didn't help me teach at all either...)

In January, I'm going back to the schedule I put into place three years ago when my son broke his leg. I missed 1-3 days of school each week over an 8 week period. At that time, it was impossible to leave centers for a sub (can we spell play time???). Instead, I made up a rotation and if we got to centers that day - great! If not, no big deal. We'll do the next day's centers when we got to it. This allowed me to extend a lesson if I needed to and skip centers; all students did assignments on the same day; and if I had a sub, I didn't panic about trying to write up what each center was supposed to be doing. Not to mention, it didn't phase me when we had a 4 day work week, a field trip, or a random assembly. No centers? No problem!

It works for me. Will it work for every teacher? Probably not. We're all different. For me, though, I needed less stress and taking away the requirement that I get to centers every day for x number of minutes was what I needed!

Planning Centers

When planning centers, I keep it as simple as possible. There's the teacher-led small group, a computer station, and seat work.

Teacher-Led Small Group: I use data to determine what skills my students need to work on. Then, I'll either group students using that data or pull whatever students I need that day from their center. Either way works as long as you're not taking actual grades on the centers. For the curriculum, I may invent my own from time-to-time, but more often I'll use the reteach lessons in my textbook or the lessons our computer software gives us (iReady is the software we use). Slight changes are always needed, of course, but it gives me a starting point without reinventing the wheel. Students keep all work we do in their Math notebooks. Sometimes, I'll assign a homework sheet from CommonCoreSheets and then pull those students to review the work the next center day before I pull my small group for that day. (That website is amazing, by the way. It's completely free and has worksheets for pretty much every Common Core math standard. And, each worksheet has about 10 different variations. So, if a kid struggles on the assignment, reteach it and reassess it using a different worksheet. Oh, and the worksheets are designed so that you can lay them out about and grade about a half dozen at a time. MAJOR time saver!)

Computer Station: My students work on a computer program called iReady. They have their user names & passwords in their notebooks (or memorized) and log in by themselves. They record their work & test scores in their notebooks. When they come to small group, I do a quick check in with them to see if there is anything they're struggling with. If so, I can do a mini-lesson there or pull them when I finish with the small group. We also have an incentive system built around iReady so that they're rewarded after they pass so many lessons.

Seat Work: My seat work stations are always something familiar so that there is no learning curve. I like to use Math Ladders or Games that use Task Cards. Once I teach students how to do these centers, I switch out the skill. They're then constantly changing the skill being practiced, but not learning how to play a new game. I find this to be a lot more beneficial than the store-bought games that focus on one skill (or a bunch of random skills, including ones I haven't taught). The store-bought games require me to spend a lot more money and the kids spend more of their center time reading the directions rather than playing the game. If I do happen to throw a game in that's not a regular (my Go Fish games are popular), then I try to keep it for at least two weeks so they can learn the style of game and then have real practice time with it.

Grading Centers

I've gone between everything from grading all centers, choose a center to grade, and grading none. The challenge I have with grading centers is what to do when students are absent or pulled for small group instruction. Make up work is not possible because we change classes. There is literally no extra time in my students' days for make up work.

This year, I'm having students keep their work in their Math Notebooks. If I know of a student that is chronically off task, I can conference with him/her about the math work when I finish early with a small group. I've also put the students in groups and am awarding points to each group when I see them on task or deducting points when they're off task. Fourth graders are very competitive and these points equal tickets to them to use in our book raffle. (See my other post about the book raffle for a cheap incentive for students!)


Free Download

Click the picture below to download my Excel Planning file from my Google Drive.