Saturday, September 14, 2024

Place Value Power-Up! (Multiply by 10, 100, or 1000)

This game helps students practice multiplying by 10, 100, and 1,000 in a hands-on and engaging way. By rolling the die and multiplying different numbers each time, they’re challenged to think critically about place value shifts and develop fluency with these operations in a fun, interactive setting.

Objective:

Students will practice multiplying numbers by 10, 100, or 1,000 using a fun, interactive game that reinforces the concept of place value shifts.

Materials:

  • Dice (1 six-sided die per pair or group)
  • Index cards or paper slips with numbers (ranging from 1 to 999)
  • Large place value chart (optional)
  • Dry-erase boards and markers (or scratch paper)
  •  Multiplication mats (simple charts showing x10, x100, and x1,000 columns)

How to Play:

1. Setup: Create a set of number cards by writing different numbers (from 1 to 999) on index cards or slips of paper. Shuffle and place these in a pile. Each student or group needs a dry-erase board (or paper) and a die.

2. Roll for Power: Each player/group rolls the die. The number they roll determines the multiplier:

     - Roll a 1 or 2 = Multiply by 10

     - Roll a 3 or 4 = Multiply by 100

     - Roll a 5 or 6 = Multiply by 1,000

3. Pick a Number: The player draws a number card from the pile.

4. Power Up the Number: Using the dry-erase board or scratch paper, the player writes the number they drew and multiplies it by the number of powers determined by their die roll. For example, if they drew "34" and rolled a "3" (multiply by 100), they would calculate: 34 x 100 = 3,400.

5. Show Your Work: Players must explain how they arrived at their answer by discussing how the digits shifted when multiplying by 10, 100, or 1,000. Encourage them to think about moving digits left and filling in zeros as placeholders.

6. Earn Points: Correct answers earn 1 point. Bonus points (1 extra) can be given if the player provides a clear explanation of how the place value shifted.

7. Repeat: Play continues with students drawing new number cards and rolling the die. The first player or group to reach 10 points wins.

Optional Variations:

- Challenge Level: Add in decimals to increase difficulty, having students multiply numbers like 4.2 or 13.75 by 10, 100, or 1,000.

- Relay Race: Set this up as a team game where students must race to complete each step (draw, roll, multiply) and then pass the board to the next teammate.

- Craft Version: Have students create and decorate their own “power-up” dice with fun, colorful designs representing each multiplier (x10, x100, x1,000).


Need more activities to practice multiplying by 10, 100, or 1,000?


Tuesday, August 20, 2024

Mastering Rounding: Strategies and Resources

Rounding numbers is a fundamental math skill that helps students estimate, simplify calculations, and understand number sense. However, the abstract nature of rounding can be tricky for some students to grasp. Visual aids, hands-on activities, and digital resources can make this concept more accessible and engaging.

The Importance of Visualizing Rounding

One of the most effective ways to introduce rounding is by using a visual aid, like a rounding poster.  Visualizing the number line and the process of deciding whether to round up or down helps students see the "why" behind rounding, not just the "how."

How to Use a Rounding Poster in Your Classroom:

Introduction: Demonstrate rounding with example numbers. I like to have students count how far away a number is from the tens it sits between. We'll start with a number, like 43, and first identify which two tens it is between. Then, we'll count how many jumps away it is from 40 and 50. Doing so allows the students to see why we round 43 down to 40.

Reference Tool: Keep the poster visible during independent work and group activities so students can refer back to it as needed.

Differentiated Learning

After students have a grasp of the basics, it’s essential to offer varied practice opportunities. Task cards and math ladder activities are perfect for reinforcing rounding skills and providing differentiated instruction.

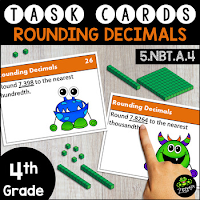
Task Cards can provide students with ample opportunities to practice rounding. They can record their answers on the provided answer sheet or use the cards in a game format. Partners can hold each other accountable before allowing their opponent to move forward in the game.


Math Ladders are an excellent resource when you need to differentiate within your classroom. The Math Ladders below provide students with practice in a specific period. But, within the period, the ladders increase in difficulty. I use the earlier ladders with my struggling learners in small group, provide the middle ladders to my on-grade level students as a partner activity, and challenge my highest students with the limited digits math ladders.


Digital Centers are used in my classroom to provide students with a self-checking activity. I especially like this one as it includes more instruction for my struggling learners and has a fun way of checking the answer by moving the magnifying glass to reveal to correct solution.

I find that it's extremely important to review rounding throughout the year, so I will assign one of the three above tasks during math centers several times a month. This allows the process to remain fresh in my students' memory, but also changes what they are working on so it doesn't become too tedious. 

Tuesday, August 13, 2024

Meet the Teacher - In the Science Classroom


It's nearly time to get ready for back to school and Meet the Teacher! If you're an introvert, like me, it can be a very stressful night. All these new families to meet! It's overwhelming! I decided to jot down a few things I wish I would have thought of/known for my first year. 

Veteran teachers, keep scrolling....this is stuff you already know.
  1. Wear comfy shoes! You've spent all summer in flip flops and now you're going to try wearing heels non-stop for several hours? No way. Not happening. I've never had a parent judge me for wearing a boot with a 3/4 inch heel instead of stilettos.
  2. Find your name tag and have it handy. My second year, I was scrambling. I knew I'd put it somewhere...just couldn't remember where! From then on, it always went into my pen mug on my desk over the summer. When I came back, I just had to find the pen mug...
  3. Write your name on the board & have a class list hanging up somewhere. I was so embarrassed when a parent mentioned it my first year of teaching! I hadn't thought of that and no one was helping me with the last minute things like that. It seemed obvious after the parent said it....but I'd been running around all day and hadn't thought of it.
  4. If you're bad at making small talk (some people are gifted...I'm not one of them...), then have a couple of talking points ready. I ask the kids about their favorite subject in school, if they did anything exciting over the summer, favorite books/series, and show them our tadpoles. Tadpoles are pretty easy to find in the summer and easy to keep in the classroom. A large pretzel jar cleaned out and filled with water (if you use tap water, let it sit 24 hours so the chlorine evaporates), aquarium gravel, and some plants (preferably live from your pet store) is all they need to get started. See my post on animals in the classroom for more details.
  5. At some schools, the expectation for teachers to provide a take home treat is very real. I've done bags of popcorn or a pop it keychain with a Thanks for Popping In note attached to it. I've also made cupcakes for the kids. Dollar Tree has small cups and goody bags that are the perfect size for holding the cupcakes. And, if you're feeling like you can splurge a little bit, the Albanese Tropical Rainforest Frogs taste great & look good on top of the cupcakes. Or, any Candy Frog will do.
  6. And finally, the paperwork. I put all of the papers that can be filled out at home in a folder with their child's name on it. The ones I NEED signed that night (the ones that require a school witness) are on the desks, with pens. It's very easy at the end of the night to see who didn't stop by. Always have a few extra folders ready for new kids that enroll that night and are sent to your room.
I also have name tents (just printed on cardstock & folded in half) ready for students to place at their new seat. Those that come to Meet the Teacher get to choose their seat for the first few days in my class. I move seats around after I get to know the kids a little bit. If you'd like a simple name tent, click the link below.


Finally, my room is not Pinterest Perfect. It's real. It's bright, colorful, full of aquariums/terrariums, and I use posters & books to decorate instead of pricey fabric and fancy tape. If you're a first year, chances are you'll be lucky to have posters & a library. Check Good Will and garage sales for great prices on books! And if you can't find them, check them out from your school library. And, don't forget that Dollar Tree has posters, bins, office supplies, and other classroom decor that can get you started.

Sunday, August 4, 2024

Digital Math Ladders

 I've used Math Ladders in my class for years now - I love how easy it is to differentiate learning for my students by giving them ladders that increase in difficulty within each set. But, I also love how many ladders I have for each skill. For example, most sets of ladders have at least 10 different versions! 

When I begin teaching my students multi-digit multiplication, I will first assign Set 3.2, Ladders A, B, & C, and have students practice multiplying a multiple of ten by a single digit. Then, we move to Ladder D, which provides students with practice multiplying a 2-digit number by a 1-digit number, but all of the digits are low (very easy facts that most students have memorized) and require no regrouping. Once D is mastered, E moves students into low digits that require regrouping. By the time the students make it to Ladder J, students are multiplying any 2x1 digit number.


That one set of math ladders can be used for 10 different centers throughout the year - which I admit I rarely do because our benchmark needs students multiplying 4x1 digit numbers. I move students into the other math ladders quickly so they can practice with all of them.

This summer, I have added a digital option for ALL math ladders. 

Need a digital option for a grade? Kids checking out early & need to take their work home? Fast finishers that need a challenge? No problem! Use the digital math centers, save on copies, and allow students to move at their own pace. You can delete the ladders you don't wish students to solve (and the answer key!) if you wish to take it for a grade.

You know when a parent asks for additional work at home and you're left to search for a worksheet you won't be using in class? Consider the digital ladders a solution to that dilemma. Just point parents in the direction of the math ladders in your digital classroom and students can access the digital version from their home device. They will even be able to check their work.


Check out the Free Math Ladders below for an idea of how they work.


Look through the bundles for a skill you might be interested in.
If you buy the bundle, you'll save at least 20%.


Tuesday, July 23, 2024

Boosting Math Skills with Posters: Rounding and Divisibility Rules

Let’s talk about two awesome visual tools that can make math more engaging and easier for our students: a poster to help with rounding and a set of posters for divisibility rules. These posters are not just informative, but they also add a splash of color and fun to your classroom.

Poster 1: Making Rounding Fun and Easy


Rounding numbers can be a bit tricky for some students, but with a colorful and clear number line/poster, it becomes much simpler. This visual tool is designed to help students understand and visualize the rounding process with ease.


Spanning numbers from 0 to 100, each non-multiple of 10 is marked with an arrow showing the direction it rounds. This feature provides clear guidance, helping students make accurate rounding decisions.

When teaching rounding, I have students count just how far away their number is. For example, 57 is three hops away from 60, but seven hops away from 50; therefore, 57 rounds to 60. It might take repeated examples, but this strategy has really helped my students understand the concept of rounding.


Poster 2: Mastering Divisibility Rules and Key Math Vocabulary 


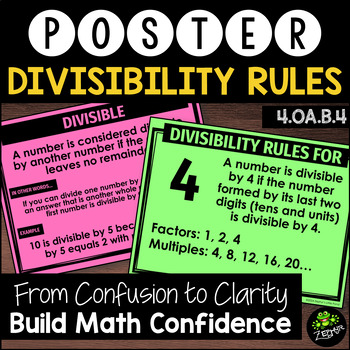
Divisibility rules are essential for understanding factors, multiples, and simplifying fractions. A set of posters outlining these rules for numbers 1-12, along with some key vocabulary, can be a game-changer in your classroom.

Each poster includes the rule of divisibility, the factors of the number, and the first five multiples of the number. Numbers are clearly displayed to make finding the needed rule fast & easy.

Why are these Divisibility Rules Posters a game-changer?


  • Complete Coverage: No need to hunt for additional materials – you'll have all the divisibility rules and key terms you need in one convenient set.
  • Encourages Independence: With mini posters for student notebooks, learners can take charge of their own learning.
  • Flexible Use: Whether you're teaching in a classroom, homeschooling, or tutoring, these posters fit seamlessly into any learning environment.
  • Supports Everyone: From struggling students to math whizzes, these posters cater to all levels, ensuring no one gets left behind.


Making Posters Part of Your Daily Routine

  • Daily References: Refer to the posters during lessons to reinforce what you’re teaching to help students become familiar with the posters.
  • Student Use: Encourage students to refer to the posters when they need help to promotes independence and confidence in their math skills.
  • Interactive Activities: Create activities or games that use the information on these posters. You might pick up a set of task cards that focus on the skills and let the students play games during center time.
Using these posters, you can create a classroom environment that’s not only more engaging but also supports all learners in mastering essential math concepts. They turn tricky topics into visual, fun, and memorable lessons that stick with students long after class is over.


Use the posters while working on Math Centers.


Thursday, July 4, 2024

Using Games with Your Task Cards


I absolutely love using centers in my math class. They give me the opportunity to meet with small groups of students and focus on their specific needs. Meanwhile, the rest of the class can work on practicing the skills they need to improve. After many years of teaching math and understanding what students really need to practice versus what they quickly grasp, I began creating a large variety of task cards.

Many teachers use my task cards to play Scoot, but this whole-class activity doesn’t quite fit during small group time. That's where Game Time comes in.

What I love about these games is that once the students learn how to play them, you can easily swap out the task cards to change the skill they're practicing, without having to teach a new game each time. This variety keeps the students engaged and makes them feel like they’re doing something different with each center rotation, when they’re actually just using new task cards. And setup? It couldn’t be easier!

A Few Game Ideas...

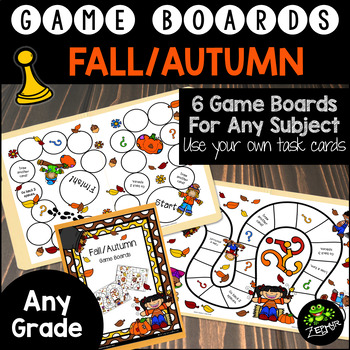
Tic-Tac-Toe {FREEBIE}  BOOM! A Game to Play with Task Cards: FREE!   Fall/Autumn {Game Boards}


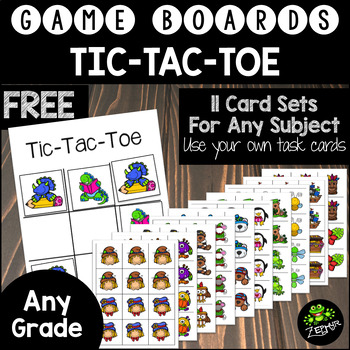
Tic-Tac-Toe (FREE): Print out a couple of boards for partners to use and then leave them in the center. Change out the tokens every month to go with the season.


Boom 
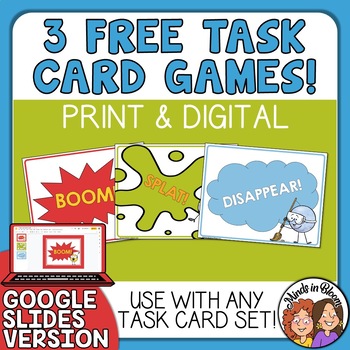
(FREE): Not mine, but a favorite of my students. You'll need an oatmeal or Nesquick canister (large, cylinder kind) and then you're good to go. My kids love this game.


Jenga 
(FREE): You need a Jenga set you don't mind writing on - check Goodwill. Number each block. Play like regular Jenga, but in order to pull the block, kids have to answer the question on the corresponding task card.


Game Boards 
(Very Inexpensive): I have a bunch of game boards in my store that can be used throughout the year to go with the different seasons. Each set comes with multiple board layouts so things can look a little different when students visit this center. But, with the rules being the same, kids won't be up at your desk asking questions about how to play.

Set Up

I keep a manila envelope for each game, with the rules on the back for reference, and simply drop in a new set of task cards each week. For the Boom set, I just drop a new set of cards into the canister & it's ready to go. Even Jenga gets its own envelope so that the instructions & cards stay together. 

If students are struggling with a skill, I'll move that set of task cards from one game to another for additional practice during the next center rotation. Otherwise, I rotate through what we just learned, something everyone is struggling with, multi-step word problems, and something related to number sense (rounding often shows up in our rotation).

Tuesday, June 4, 2024

5 Things to Do Before Beach Mode

There are plenty of blogs out there that tell you how to pack up your classroom before Summer Vacation to ensure a smooth start to the new year, but below are a few of my Must-Do's before I stick my toes in the hot, Florida sand.

1. Look at my Rules & Procedures - Do changes need to be made based on this year's classroom behavior? Did you find something amazing that you wish you could have implemented this year, but finding it in March would have meant revamping your entire classroom with only a few months left? Did you forget to include something that would have been important?

This year, I forgot about Mr. Potato Head. Our 4th graders change classes & earn points from each teacher they visit based on their behavior. (3 points: normal day; 4 points: amazing day; 1-2 points: we need to work on something; 0 points: really awful day, those are few!). When my students earn a 4, we put a piece on Mr. Potato Head. Once he's full, the class earns some sort of reward from their homeroom teacher - extra recess, lunch outside, sit by a friend, etc. This year, Mr. Potato Head sat faithfully on my shelf, completely forgotten. He's in my back-to-school basket to be remembered next year.

I also do a ticket/raffle system for individual incentives. Students earn raffle tickets from all of their teachers for pretty much any positive behavior - answering questions in class if the class is a bit too quiet that day, bringing supplies, completing iReady lessons, improving on our benchmark tests, etc. I then do a book raffle in my classroom at the end of each month. Students from all classes can put their tickets in the raffle. Other teachers also have raffle systems in their classrooms for other items: candy, treasure box, etc. Oh, and the time between Thanksgiving & Christmas the raffles in my room become weekly and are for items students might wish to give to family members for Christmas. I pick up random items from thrift stores & Dollar Tree throughout the year to supply those raffles.

2. Math Centers -  Before you leave, organize those centers. Get students to help during the last week of school. So many of my students are great helpers and/or want to be teachers themselves. Use that energy and let them double check to make sure all of the pieces are there. Then, organize your centers. I like to use a manilla folder for each center with the Common Core standard written in the corner. (My state keeps changing the benchmark naming system...using just the Common Core standard allows me to quickly find which one I need without relabeling every few years.)

3. Science Labs - While the students are sorting your math centers, now is a great time to go through your science labs. I keep each unit in its own bin/tote. During the year I try to purge as much as possible that I haven't used in years, but sometimes things are just too busy. Or, there might be a bin that's only used every few years. (My oil spill lab only gets used if we finish state testing early.) Take the time now to go through the bins, toss things that don't match your benchmarks anymore (as long as you can realistically get them back...keep those film canisters...they're impossible to find!), and then make a list of things you need to replenish. Even if you can only do 2 or 3 bins, do the ones you'll need in August/September and you'll be able to start the year with minimal prep. Oh, and that list...I recommend putting it in Google Keep if you have a Google account. You won't lose it and will be able to access it on your phone over the summer.

4. Financial Paperwork - I have a folder stuffed full of reimbursement paperwork, copies of receipts I turned in, and grant paperwork. Take the time to empty everything from this year (save it, but put it in a filing cabinet instead of the easy-to-reach spot) and replenish it with blank forms. You might even get a head start on making a list of grants you want to write for next year. If you've got a science class and never written one for Pets in the Classroom Pets in the Classroom, I highly recommend you do so. It's very easy and the first year they'll give you everything you need to get your classroom pet set up. I wrote one for a fish aquarium and have since added other animals to it. Every year, I go back in August and write a sustaining grant which helps cover the cost of maintaining our aquarium. Please note that you will not be able to apply for a grant for the next school year until that August.

5. Start Planning - I created a lesson planner with boxes the size of sticky notes for my lesson/unit planning. Every year, I simply move the sticky notes to the next year's planner. Of course, adjustments are made based on what went well last year and new curriculum, but the sticky notes allow the majority of my plans to easily be transferred. Download the free planner below.


Happy Summer!